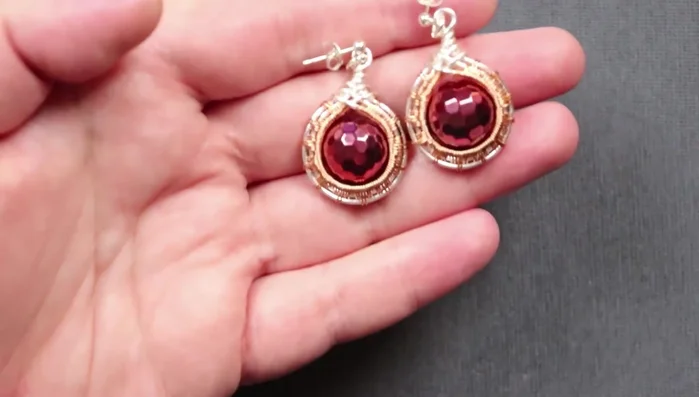
Sunburst earrings are a timeless classic, radiating a joyful energy that instantly elevates any outfit. But what if you could create your own stunning pair, effortlessly and affordably? This tutorial will guide you through the simple process of crafting beautiful sunburst earrings using nothing more than wire – no special tools or prior crafting experience necessary! These dazzling earrings make a perfect personalized gift or a fun weekend project for yourself, allowing you to showcase your creativity with minimal effort and maximum impact.
Forget expensive jewelry stores; you'll be amazed at how quickly and easily you can make these eye-catching accessories at home. We’ll be using readily available materials, transforming simple wire into a piece of wearable art. Ready to get started and add some sunshine to your jewelry box? Let's dive into the step-by-step instructions below to make your own DIY sunburst wirework earrings.
Preparation and Safety Guidelines
- 1 mm gauge silver round wire
- 0.4 mm gauge copper round wire
- 14 mm round copper-coated quartz gemstone beads
- Earring posts and butterfly backs
- Jump rings
- Flush cutters
- Chain nose pliers
- 6-step bail making pliers (or round nose pliers)
- Always use wire cutters designed for jewelry making. Regular scissors can damage the wire and are dangerous.
- Be mindful of sharp wire ends. Use pliers to carefully tuck in or crimp any sharp points after cutting to avoid injury.
- If working with multiple colors of wire, avoid touching your face or eyes until you have thoroughly washed your hands. Some wire coatings can be irritating.
Step-by-Step Instructions
Prepare Materials
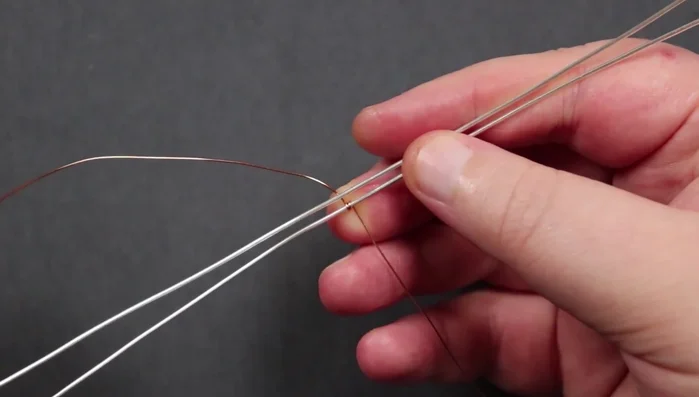
- Cut three 25cm lengths of 1mm silver wire (base wires) and one 1m length of 0.4mm copper wire (weaving wire).
Attach Weaving Wire
- Fold the weaving wire in half to find the midpoint. Place the weaving wire behind the base wire and wrap it around twice to secure.
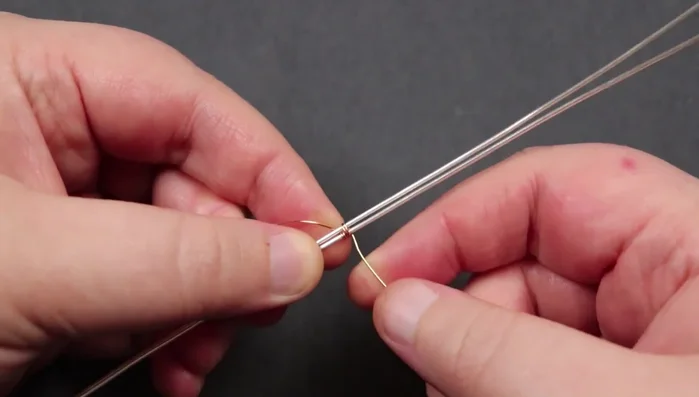
Weave First Pyramids
- Add the second base wire, laying it over the weaving wire. Continue the weave by bringing the weaving wire over the top of both base wires and down behind, repeating this twice. Don't pull too tightly.
- Add the third base wire, repeating the weaving pattern (over the top of all three, then down behind). Repeat the pattern twice more for each pyramid. Maintain loose spacing between base wires.
- Create three pyramids on each side, using the weaving wire to create a small pyramid shape with each section of two wraps. Make sure to maintain loose spacing between the base wires.

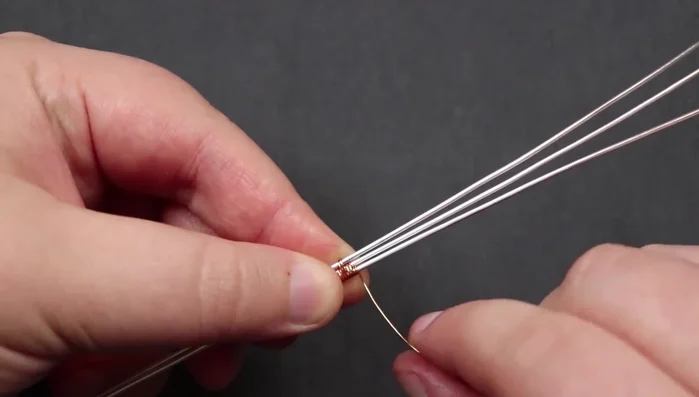
Weave First Pyramids Shape Half-Circle & Attach Bead
- Flip the piece over. Push the wrap sections close together and gently curve the piece into a half-circle, using the bead to guide the shaping process. Ensure the bottom of the pyramids face inward towards where the bead will be.
- Thread one end of the weaving wire through the bead, then the other end from the opposite direction. Gently pull the bead down to the base of the piece.
Shape Half-Circle & Attach Bead Weave Second Pyramids
- Continue the weaving pattern on each side of the bead to create another three pyramids on each side. Maintain loose spacing.
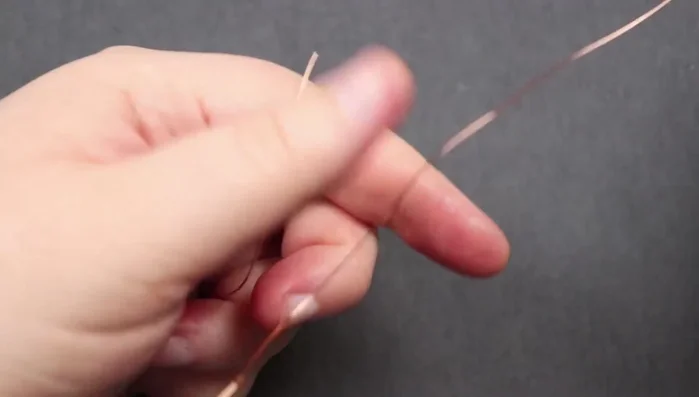
Finish Weaving & Trim Wire
- Use flush cutters to trim the excess weaving wire close to the last wrap. Press the ends down flat with chain nose pliers, tucking them between the base wires.
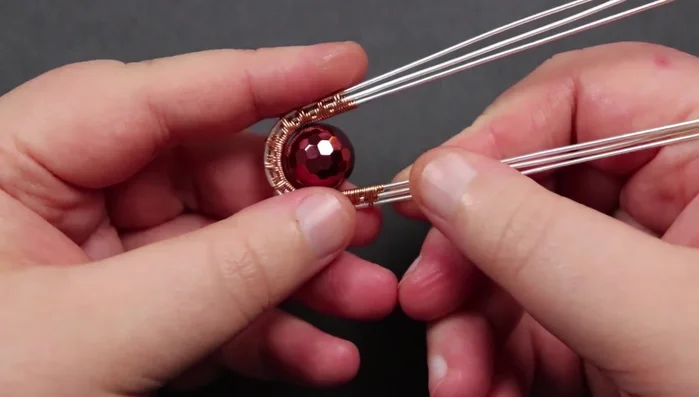
Shape Circle & Secure Wires
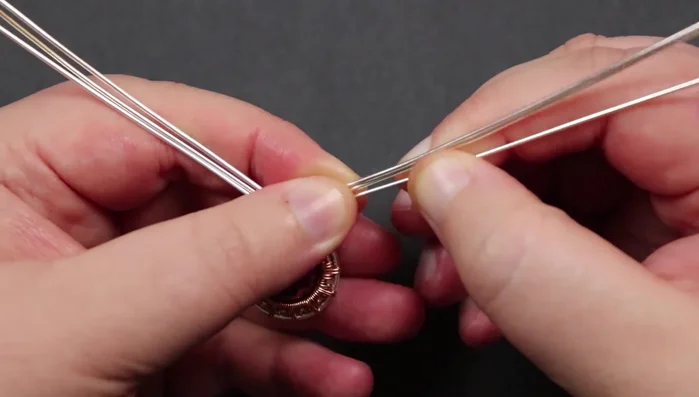
- Gently curve the remaining lengths of base wire to create a circle around the bead, allowing the ends to overlap at the top.
- Intertwine the base wires by weaving them over and under each other, ensuring they are neatly arranged.
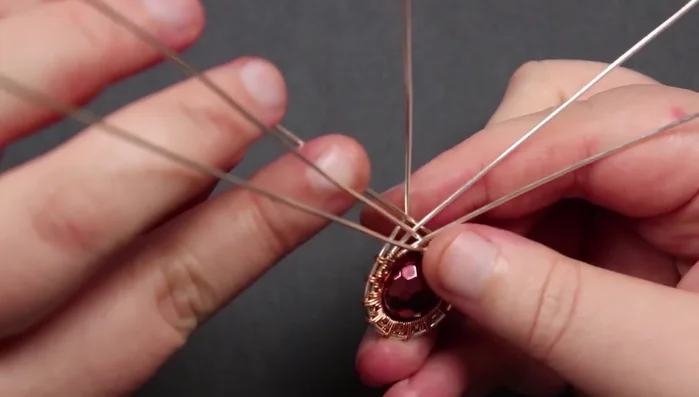
- Using chain nose pliers, create a loop at the top with one of the base wires, leaving a small tail. Wrap the tail tightly around the base wire to secure the loop.
- Wrap and secure the remaining base wires in the same manner, making sure to tuck the ends securely into the back of the piece.
Shape Circle & Secure Wires Attach Earring Findings
- Attach the jump rings and earring findings to the loops.
Attach Earring Findings
Read more: DIY Tiered Tassel Earrings: A Quick & Easy Jewelry Tutorial
Tips
- Don't pull the weaving wire too tight during the weave. Loose spacing between base wires is crucial for a neat finish.
- Use the bead as a guide when shaping the half-circle and full circle, ensuring the bottom of the pyramids face inward.
- Leave a small tail when cutting excess wire to easily secure the end into the back of the piece.