The gentle rocking motion of a chair, a comforting rhythm that soothes the soul, is a pleasure often associated with relaxation and nostalgia. But what if you could craft this comforting experience yourself? Building your own rocking chair might seem daunting, a project reserved for seasoned carpenters. However, with careful planning and the right guidance, creating a beautiful and functional rocking chair is entirely achievable, even for DIY enthusiasts of moderate skill levels. This project allows you to personalize your chair to perfectly suit your style and space, resulting in a unique piece you’ll cherish for years to come.
This comprehensive guide will walk you through each step of the process, from selecting the right materials to the final sanding and finishing touches. We’ll cover everything from essential tools and techniques to crucial safety precautions, ensuring you’re well-equipped for success. Ready to transform your woodworking skills and create a stunning, handcrafted rocking chair? Let's begin with a detailed overview of the materials you'll need and the step-by-step instructions that will bring your rocking chair vision to life.
Preparation and Safety Guidelines
- wood boards
- square
- 6mm drill bit
- nails
- flexible rod
- saw
- hammer
- sandpaper
- screws
- wood glue
- orbital sander
- chisel (optional)
- rasp (optional)
- Always use appropriate safety glasses and a dust mask when cutting, sanding, or using power tools. Wood dust is a respiratory hazard.
- Ensure all screws, bolts, and joints are securely fastened before using the rocking chair. Loose connections can lead to instability and injury.
- Test the rocking chair's stability thoroughly before allowing anyone to sit in it. Ensure it rocks smoothly and doesn't wobble or tip easily.
Step-by-Step Instructions
Prepare the Main Components
- Prepare the two main boards (15cm wide). Mark them at 10.75cm and 14cm, then 7.5cm and 7.5cm for leg holes. Use a square to ensure accuracy.
- Mark and cut the two cambodas (side supports) at 6cm and 14.5cm, ensuring they are identical.
- Mark and create the seat back. Mark at 12.5cm and 12cm. Drill 6mm holes where legs attach.
- 43cm, 20cm, 7cm, 7cm, and 9cm. Use flexible ruler to mark curves.

Prepare the Main Components - Mark and cut the front legs at 2.5cm and 28cm.
- Mark the backrest supports. Use flexible rod to mark curves.
Prepare the Main Components Drill Pilot Holes
- Drill 6mm holes at the marked points for the legs.
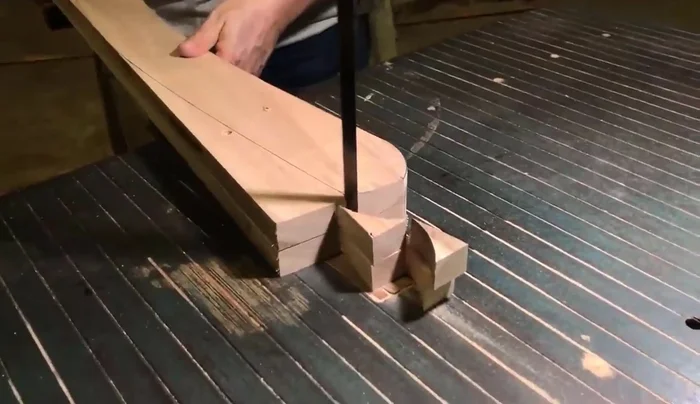
Drill Pilot Holes Cut the Pieces
- Cut all pieces, always leaving the marked lines for consistent cuts. Remove screws before cutting to avoid damage.
Cut the Pieces Sand and Prepare for Assembly
- Sand all edges and prepare for assembly.
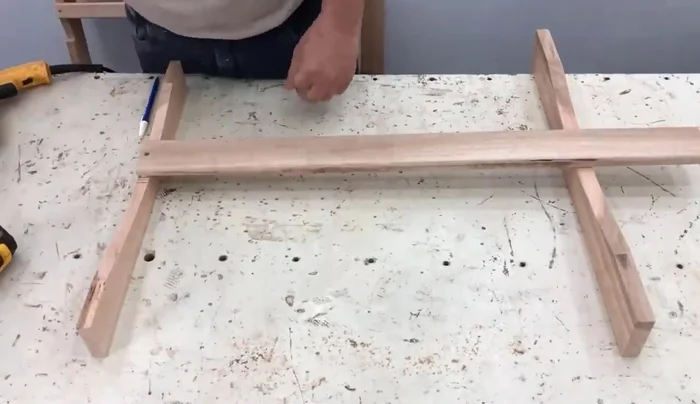
Sand and Prepare for Assembly Assemble the Seat
- Assemble the seat rods, using glue and screws.
Assemble the Seat Assemble the Backrest
- Assemble the backrest rods, using glue, screws and 1.2cm spacers.
Assemble the Backrest Attach Armrests and Legs
- Attach the armrests and legs, using pre-drilled holes, glue and screws.
Attach Armrests and Legs Attach Back Support
- Attach the back support, ensuring even alignment and using a tape measure for precise placement.
Attach Back Support Attach Backrest Supports
- Attach the backrest supports. Use glue and screws and ensure even support. Sand any rough edges.
Attach Backrest Supports Attach Under-Armrest Supports
- Attach the supports under the armrests, ensuring even alignment.
Attach Under-Armrest Supports


Read more: Build a Stunning Black Walnut Coaster Set: The Ultimate Furniture Protector
Tips
- Use a square for precise marking and cutting.
- Always remove screws before cutting to avoid damaging the wood.
- Use a flexible ruler to accurately mark curved pieces.
- Check squareness throughout the assembly process using a square or tape measure.
- Sand all edges for a smooth finish.