Christmas is just around the corner, and the pressure to find the perfect gift for everyone on your list can be overwhelming. This year, why not ditch the stress of crowded shopping malls and embrace the charm of homemade presents? Forget generic store-bought items; create something unique and heartfelt with minimal effort and cost. This guide will show you how to make adorable and functional DIY pencil holders, perfect for friends, family, teachers, or even yourself! They're a delightful and practical gift that shows you care, without requiring extensive crafting skills or a huge time commitment.
These personalized pencil holders are surprisingly easy to assemble, requiring only readily available materials and a touch of creativity. From repurposing old cans to decorating with festive ribbons and embellishments, the possibilities are endless, allowing you to tailor each holder to the recipient's taste. Ready to transform ordinary items into unique Christmas gifts? Let's dive into the step-by-step instructions and get crafting!
Preparation and Safety Guidelines
- Walnut wood
- Plywood
- Wood glue
- Clamps
- Milling machine
- Saw
- Drill
- Forstner bit (1/2 inch)
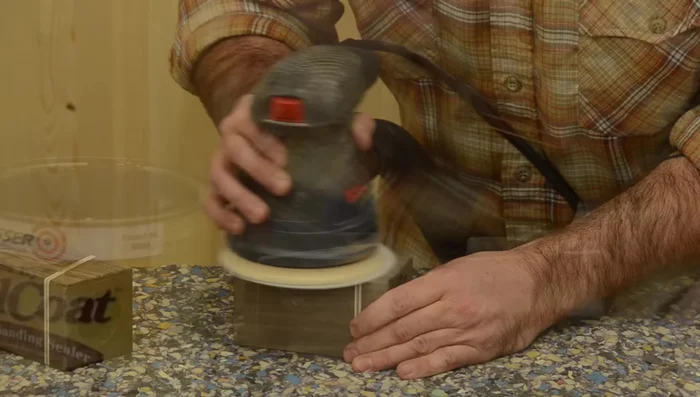
- Disk sander
- Router
- 1/8 inch round over bit
- Elmer's spray adhesive
- Shellac
- Sandpaper
- Always supervise children when using sharp objects like scissors, knives, or hot glue guns.
- Ensure adequate ventilation when using paints, sprays, or other potentially harmful materials. Work in a well-ventilated area or wear a respirator.
- Allow paint and glue to dry completely before handling the finished pencil holder to prevent smudging or accidental injury.
Step-by-Step Instructions
Prepare the Walnut Base
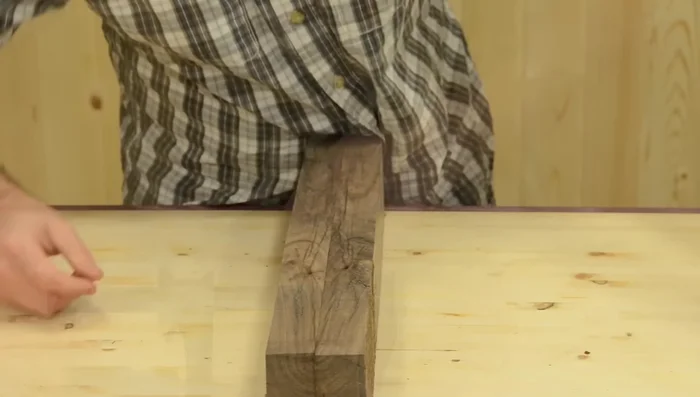
- Glue together cracked walnut pieces to create a thick board.
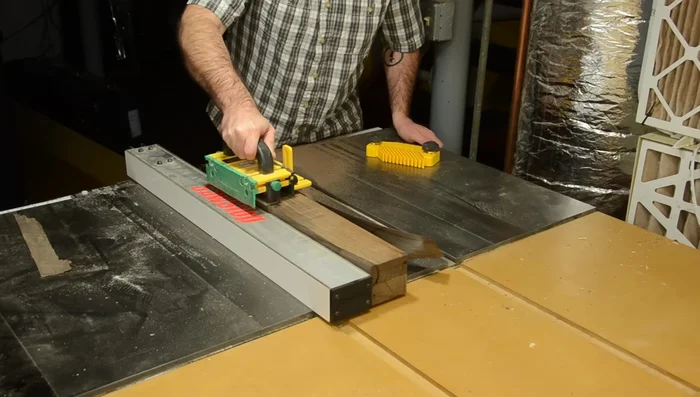
- Mill the glued board down to 2.5 inches x 2.5 inches square.
- Cut 4.5-inch pieces from the milled board.

Prepare the Walnut Base Create Decorative Top
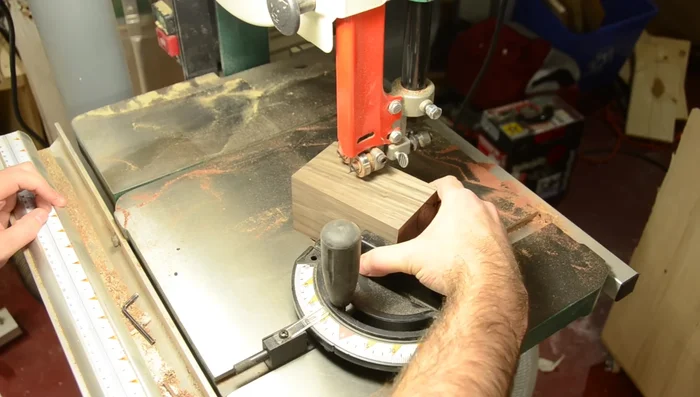
- Cut the top of each piece at a 70-degree angle for a decorative look.
- Cut a decorative square from 1/4-inch plywood (slightly oversized).
- Glue the plywood square onto the angled top of the pencil holder, then sand it flush.
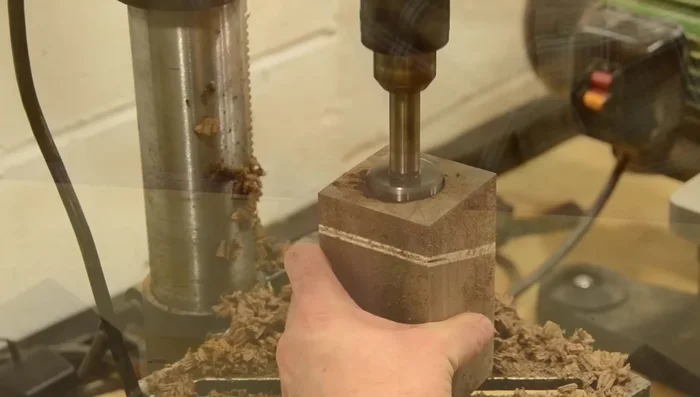
Create Decorative Top General Purpose Holder - Drill Hole
- Drill a 1/2-inch hole in the center of the general purpose pencil holder using a Forstner bit.
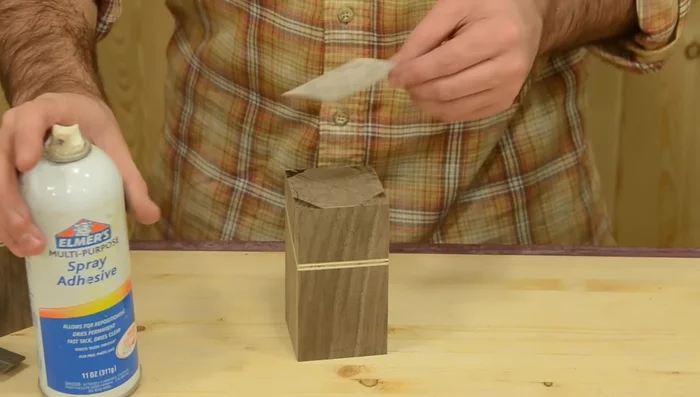
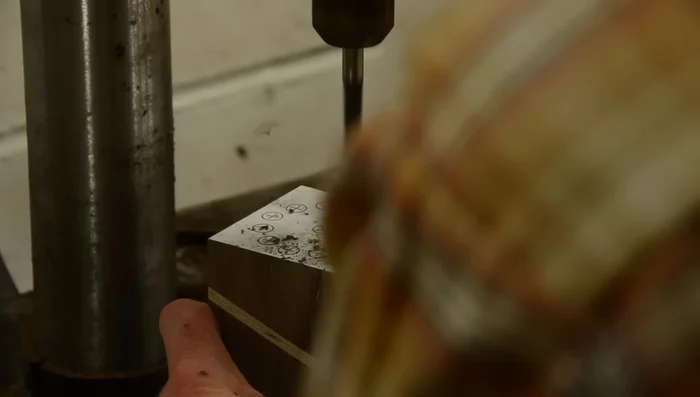
General Purpose Holder - Drill Hole Artist Pencil Holder - Create Holes
- Create a pattern for the artist pencil holder and temporarily attach it to the top using spray adhesive.
- Drill holes according to your pattern (5/16 inch holes for pencils, a 1-inch hole for other items).
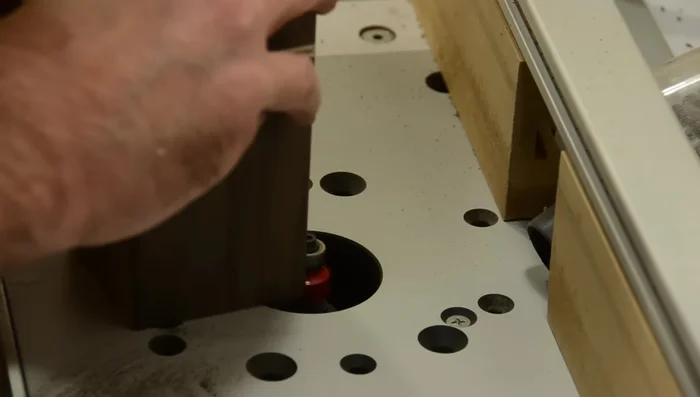
Artist Pencil Holder - Create Holes Finishing Touches
- Use a router with a 1/8-inch round over bit to round over all edges.
- Sand and apply shellac.
Finishing Touches
Read more: Build a Stunning Black Walnut Coaster Set: The Ultimate Furniture Protector
Tips
- Ensure your Forstner bit is sharp and clean to avoid burning and stalling when drilling.