Elegant pearl earrings are a timeless accessory, instantly elevating any outfit. But high-street prices can often leave your budget feeling a little strained. Luckily, creating stunning, bespoke jewelry is easier than you might think! This tutorial will guide you through the simple and satisfying process of making your own exquisite pearl wire-wrapped earrings, a project perfect for beginners and seasoned crafters alike. You'll be amazed at how quickly you can transform basic materials into a beautiful pair of earrings that reflect your personal style.
Forget expensive jewelry-making kits and complex techniques; this project requires minimal tools and materials, making it a fantastically accessible craft for anyone looking to explore their creative side. The delicate wire wrapping technique is surprisingly intuitive, and the overall process is quick enough to be completed in a single sitting. Ready to get started? Let's dive into the step-by-step instructions below to create your own dazzling DIY pearl earrings.
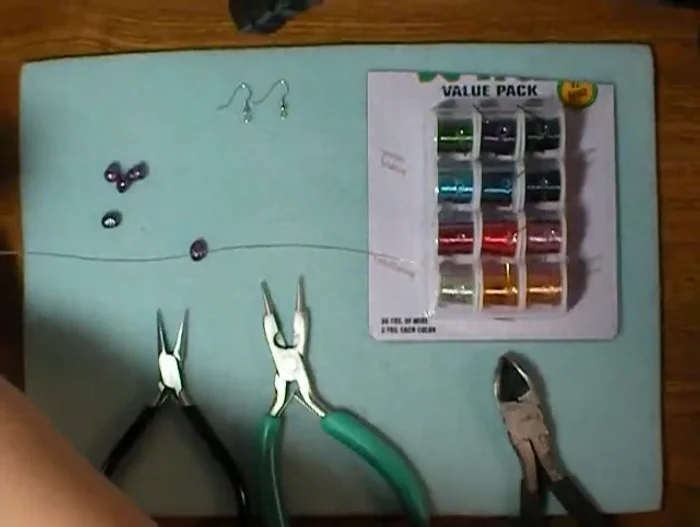
Preparation and Safety Guidelines
- Ear wires
- 22 gauge craft wire
- Top-drilled pearls
- Always use wire cutters designed for jewelry making; household scissors can damage the wire and dull the blades.
- Be mindful of sharp wire ends. Keep them pointed downwards and away from your face and body while working. Use blunt-nosed pliers to carefully bend and shape the wire to prevent accidental pricks.
- If you have sensitive skin, consider using hypoallergenic wire and findings to avoid allergic reactions.
Step-by-Step Instructions
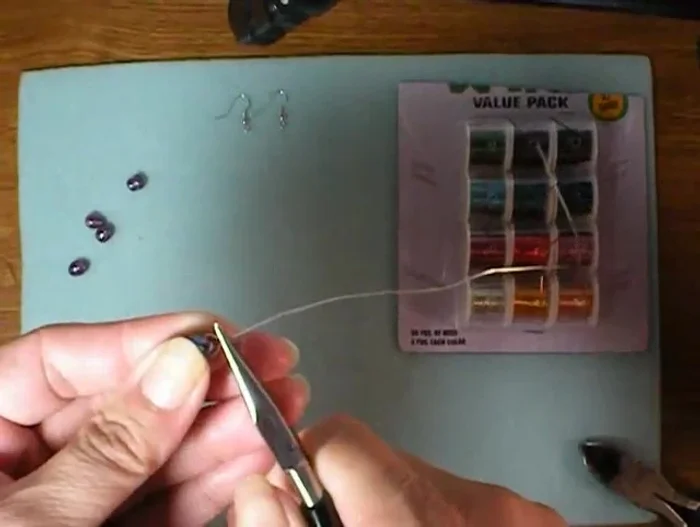
Prepare the Wire and Pearl
- Cut an 8-inch length of craft wire.
- Slide a pearl onto the wire, leaving about half an inch of wire on each end.

Prepare the Wire and Pearl Form the Initial Shape
- Bend both ends of the wire upwards to form a triangle shape above the pearl.
- Cut the shorter wire end, leaving about an eighth of an inch above the bend.
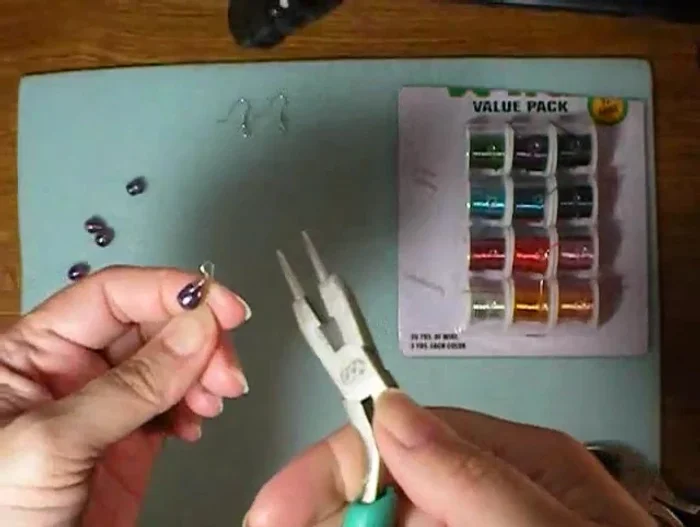
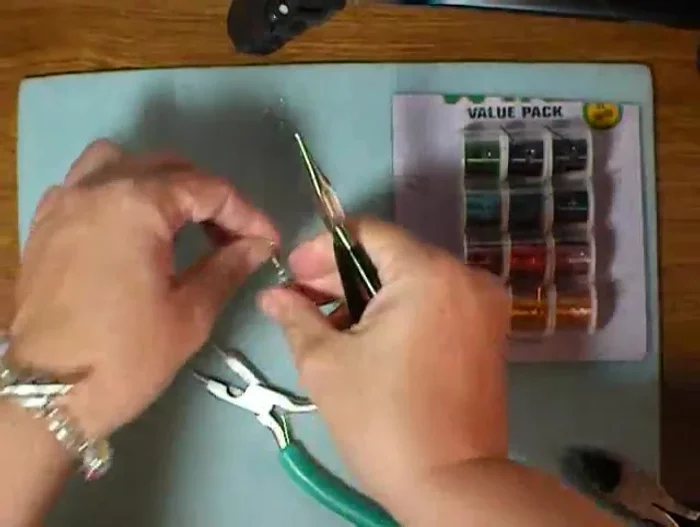
Form the Initial Shape Create the Wrap Loop
- Using chain nose pliers, grip both wires at the bend and bend the longer wire at a 90-degree angle.
- Use round nose pliers to create a wrap loop around the pearl, wrapping down past the hole.
- Tuck in the end of the wire and use pliers to adjust the loop as needed.
Create the Wrap Loop Attach the Earring Wire
- Open an ear wire, slide the loop onto it, and close the ear wire.
Attach the Earring Wire


Read more: DIY Tiered Tassel Earrings: A Quick & Easy Jewelry Tutorial
Tips
- It's better to cut a longer wire and trim excess than to run short.
- Don't worry about the exact shape of the triangle above the pearl; it won't be visible.
- You can create neat or messy wrap loops – it’s your preference!
- Consider wrapping the wire further down around the pearl's hole for a more secure hold.