Ever dreamt of crafting your own unique jewelry, a piece that reflects your personal style and artistic flair? This DIY project offers a stunning solution: a beautiful oval stone pendant crafted using just a single wire. Forget complex techniques and expensive tools; this "One-Wire Wonder" project is surprisingly simple and incredibly rewarding, perfect for beginners and experienced crafters alike. The elegance of the finished pendant belies the simplicity of its creation, resulting in a truly bespoke piece that will garner compliments. You'll be amazed at how easily you can transform a simple stone into a sophisticated statement piece.
This tutorial will guide you through each step, from selecting your materials to the final finishing touches. Ready to unleash your inner artisan and create your very own stunning oval stone pendant? Let's dive into the detailed, step-by-step process!
Preparation and Safety Guidelines
- 18 gauge round dead soft copper wire (17 inches)
- Thinner wire (24 gauge half round dead soft copper wire)
- Oval shaped stone
- Wire cutters
- Round nose pliers
- Pliers
- Always wear safety glasses when working with stones and wire to protect your eyes from flying debris or sharp edges.
- Use appropriate wire cutters and pliers designed for jewelry making to avoid damaging the wire or injuring yourself. Never try to cut wire with improvised tools.
- Ensure the stone is securely fastened to the wire before wearing the pendant. A poorly secured stone can detach and cause injury or damage.
Step-by-Step Instructions
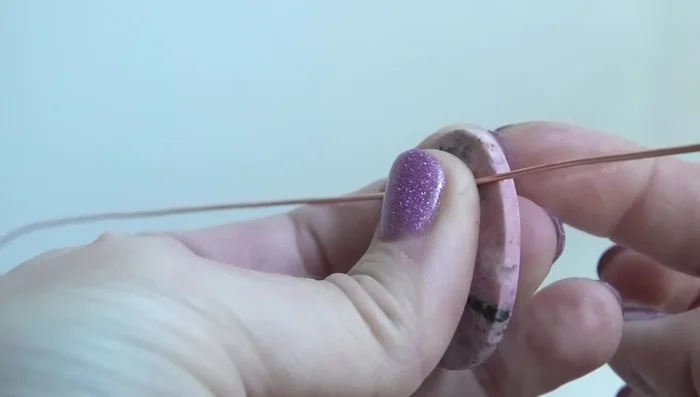
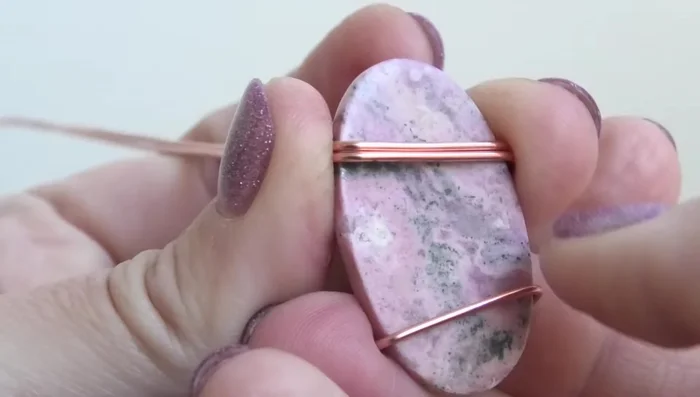
Prepare and Secure the Stone
- Find the middle of the 17-inch wire and place the oval stone on it, positioning it towards the bottom but not at the very end.
- Pinch the stone and wire between your fingers, using your other hand to bend the wire ends around the stone from back to front, creating a flat base against the back.
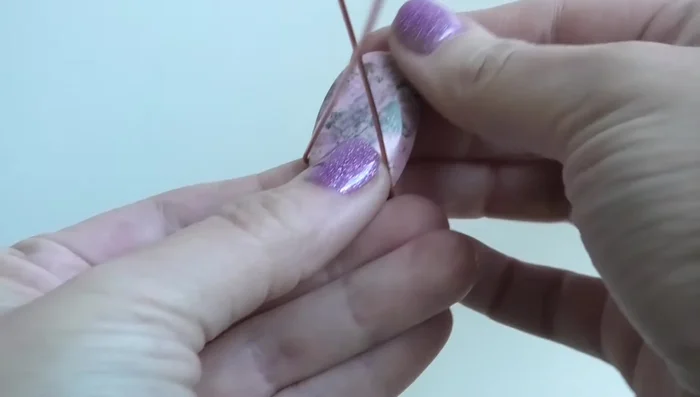
- Bend the wire ends completely across the front of the stone, ensuring the stone is securely held. Press down and up to keep the stone from slipping.
- Curve the wires around the stone, keeping them flush against its sides and close together to avoid gaps.

Prepare and Secure the Stone - Bend the wires onto the front again. This helps trap the stone more securely.
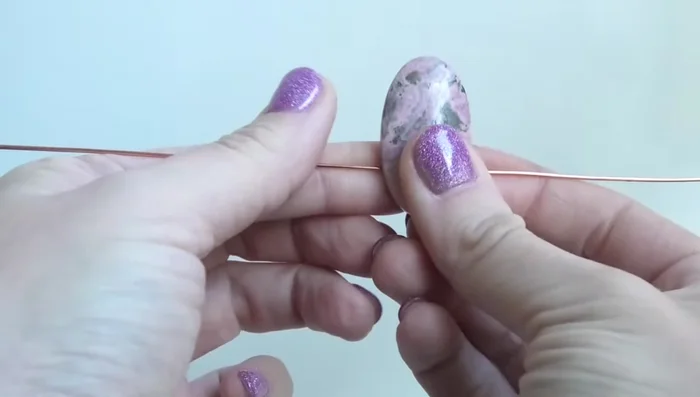
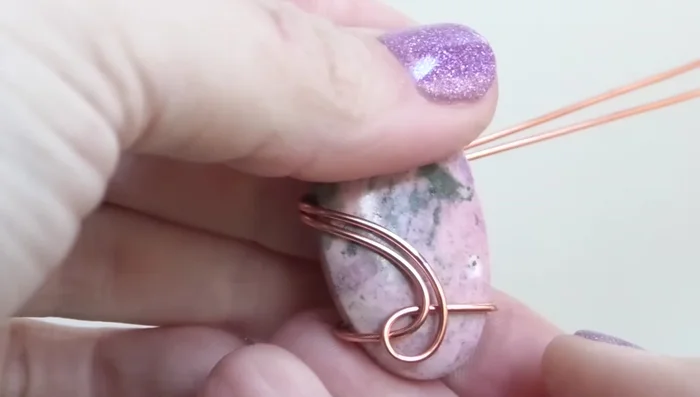
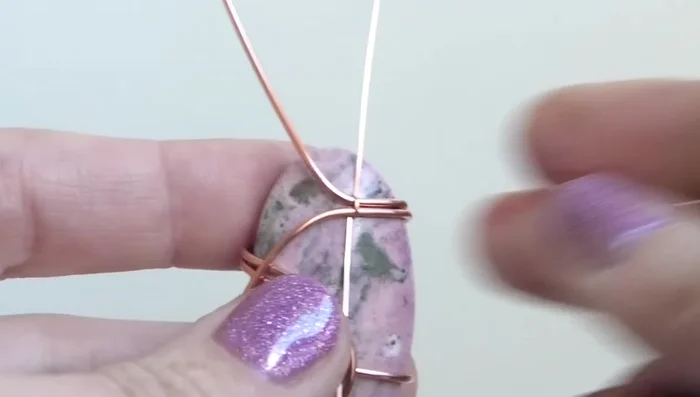
Prepare and Secure the Stone Create the Initial Wire Loops
- Curve each wire end, one at a time, creating a loop on each side. Ensure they are above the middle line of the stone.
- Bend the wires from the front to the back, ensuring they are above the middle line of the stone and near the top.
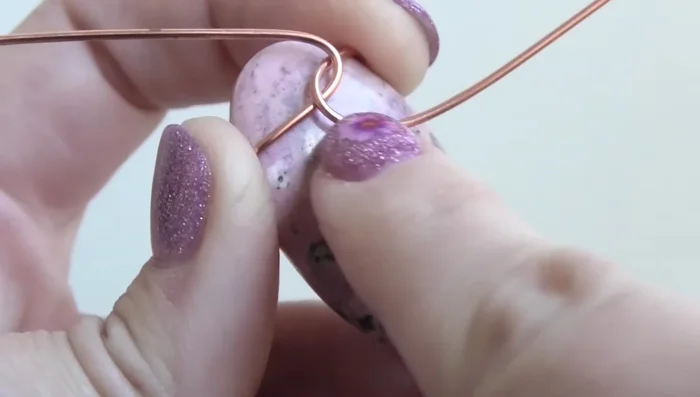
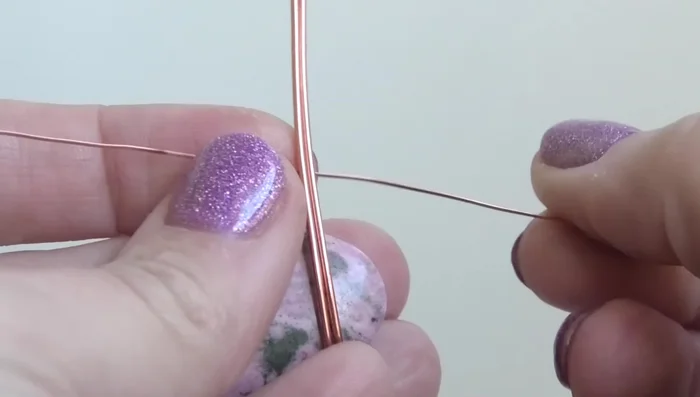
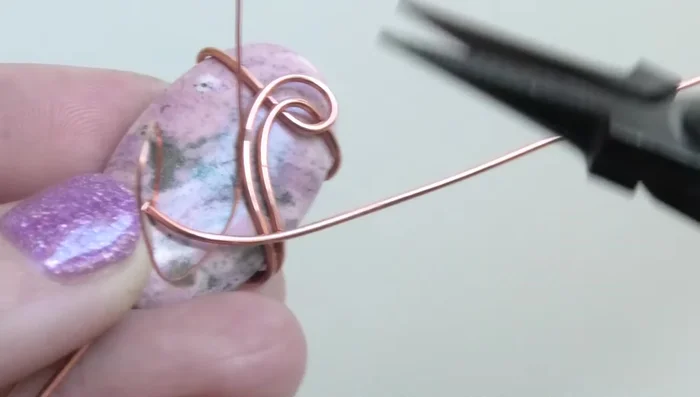
Create the Initial Wire Loops Add and Secure the Stabilizing Wire
- Use a 6-inch piece of 24 gauge half round wire, placing the flat side down underneath the two main wires, roughly in the middle.
- Wrap the top piece of the thin wire around the two main wires once, creating a secure wrap to prevent movement.
- Bend the top wire upwards and the bottom wire downwards. Bend the top wire into a bail, ensuring it’s centered at the top of the stone.
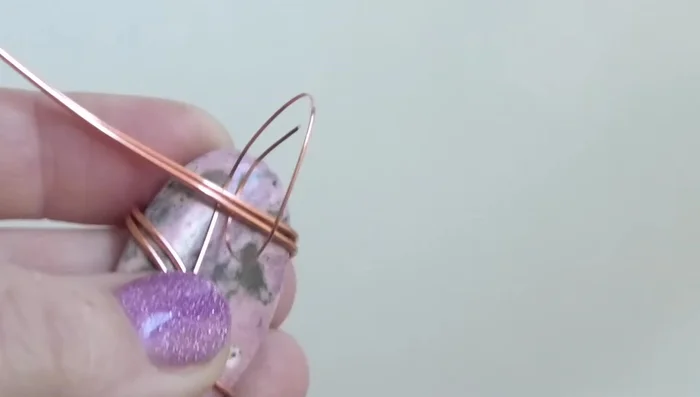
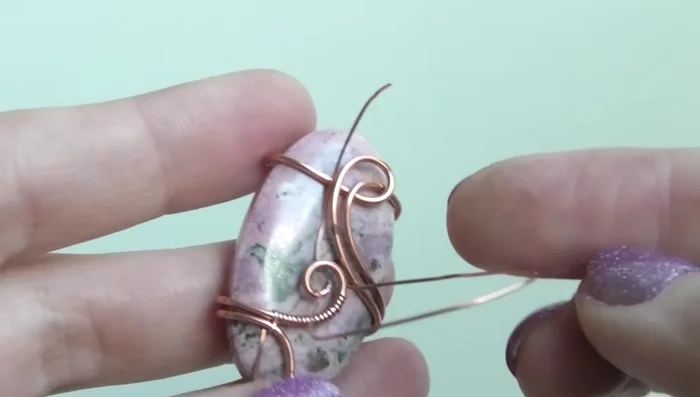
Add and Secure the Stabilizing Wire Secure the Bail
- Wrap a thinner wire around the bail multiple times to secure it, trimming and tucking away the excess.
- If necessary, attach a new piece of thin wire to create a longer length for wrapping around the bail.
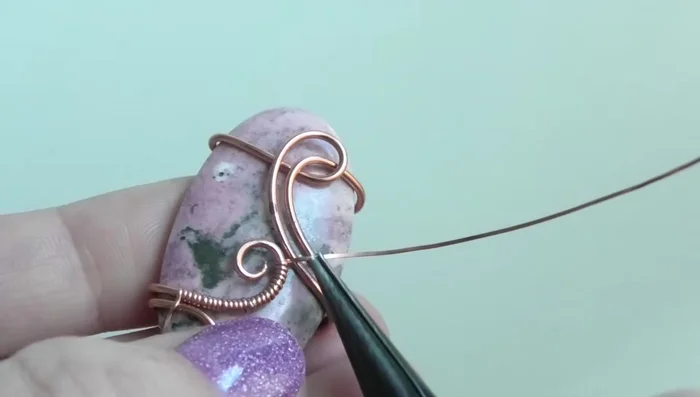
Secure the Bail Finish and Secure the Bottom Wires
- Wrap the remaining thin wire around the two main wires several times, creating a secure connection near the bottom of the swirl. Trim and tuck away the excess.
- Wrap the remaining thin wire around the two main wires to create a secure connection. Trim and tuck away the excess.
Finish and Secure the Bottom Wires

Read more: DIY Tiered Tassel Earrings: A Quick & Easy Jewelry Tutorial
Tips
- Ensure the stone is securely held throughout the process to avoid it slipping.
- Keep the wires above the middle line of the stone to prevent the stone from sliding up.
- Don’t create huge gaps between wires. Keep them close together for a more secure and polished look.
- Use pliers to help with wrapping and shaping the wire for a more precise and neat finish.
- When attaching new wire pieces, ensure multiple wraps for a secure connection.