Are you dreaming of a large, personalized chalkboard to showcase your creativity, family memories, or even just a daily to-do list? Forget overpriced, limited-size options from the store – take control and create your own masterpiece with this ultimate guide to building a DIY large chalkboard frame! This project offers a fantastic blend of functionality and style, perfect for kitchens, offices, classrooms, or any space craving a touch of rustic charm or modern minimalism. You'll be surprised how easily achievable this seemingly complex project is, transforming a simple frame into a stunning statement piece.
This comprehensive guide will walk you through each step, from selecting the right materials and measuring your desired size to finishing touches that make all the difference. We'll tackle everything from constructing the frame itself to preparing and applying the chalkboard paint for a flawless, long-lasting finish. Ready to get started? Let's dive into the step-by-step process and create your dream chalkboard!
Preparation and Safety Guidelines
- Alder boards
- Miter saw
- Trim router
- Straight cut bit
- Pocket hole jig
- Wood glue
- Pocket screws
- 1/4-inch plywood
- Track saw (or table saw/circular saw)
- Contact cement
- Poly wall
- Chalkboard paint
- Foam roller
- 220 grit sandpaper
- Plastic scraper
- Wood strip
- Forstner bit
- Keyhole router bit
- Router
- Stop blocks
- Minwax dark walnut wood stain
- Wipe-on polyurethane
- Brad nails
- Drawer pull
- Always wear safety glasses when cutting wood and handling sharp tools like saws and knives. Wood splinters and flying debris can cause serious eye injuries.
- Use caution when working with sharp objects and power tools. Ensure proper ventilation when using paints and stains, and always follow the manufacturer's instructions on their safe use and disposal.
- Ensure the frame is securely fastened to the wall to prevent it from falling and causing injury or damage. Use appropriate wall anchors based on the weight of the frame and the type of wall.
Step-by-Step Instructions
Frame Construction
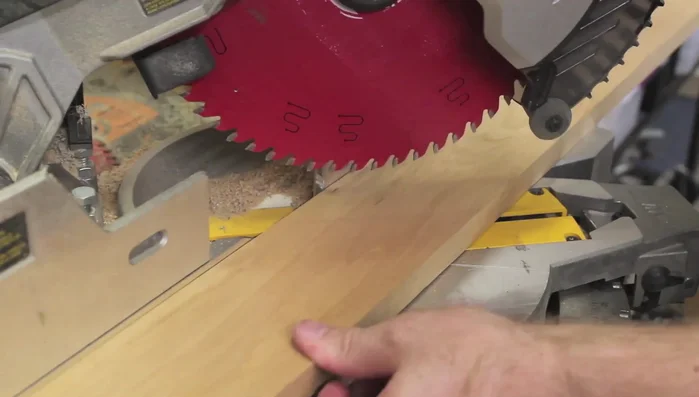
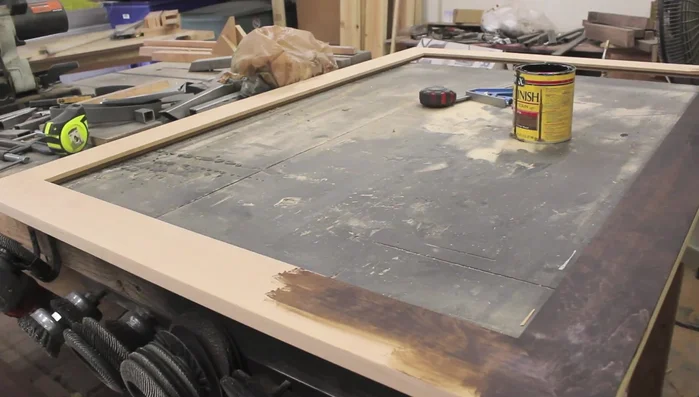
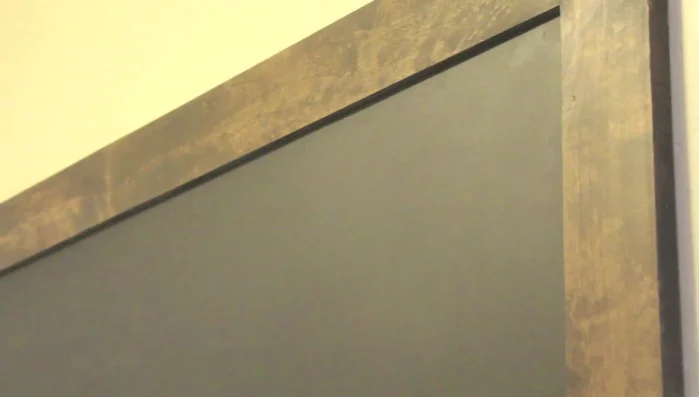
- Cut the alder boards at 45-degree miter cuts to create the frame.
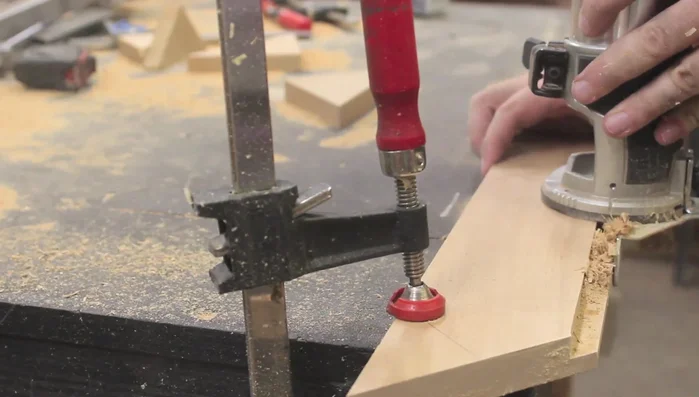
- Create a half-inch rabbet in the back inside edge of each frame piece to recess the chalkboard.
- Assemble the frame using pocket holes, wood glue, and pocket screws.

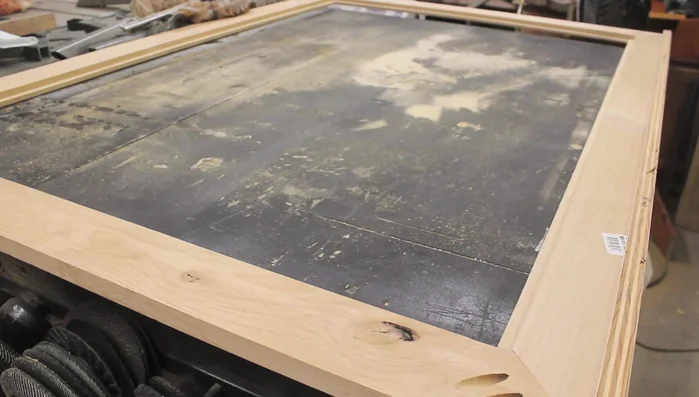
Frame Construction Prepare Chalkboard Backing
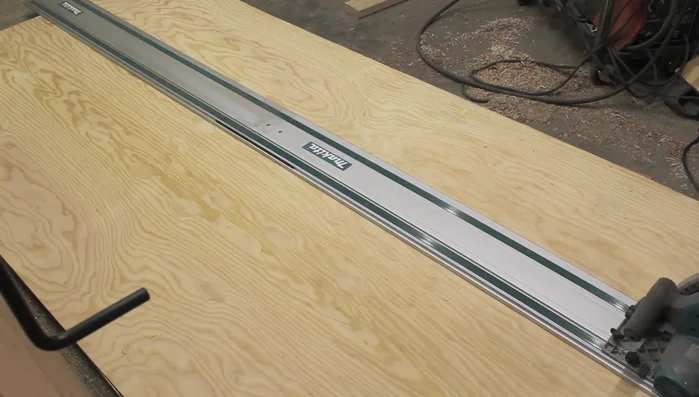
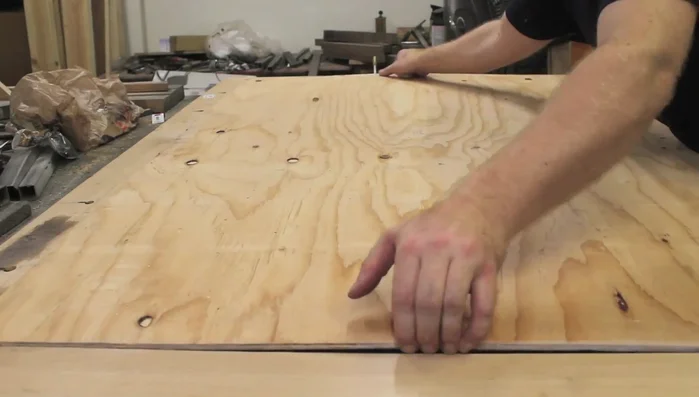
- Cut the plywood backing to fit inside the frame's rabbet.
- Apply contact cement to adhere a layer of poly wall to the plywood backing to prevent the wood grain from showing through the paint and to protect against gouges. Then paint with chalkboard paint.
Prepare Chalkboard Backing Finishing Touches
- Stain and seal the frame with Minwax dark walnut wood stain and wipe-on polyurethane.
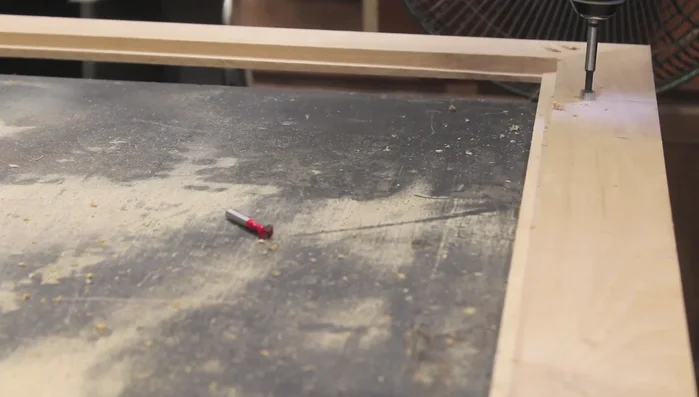
Finishing Touches Mounting Preparation
- Mark stud locations on the wall and transfer to the back of the frame.
- Drill keyhole slots in the back of the frame for hanging.
Mounting Preparation Assembly
- Attach the chalkboard backing to the frame.
Assembly Installation
- Hang the finished chalkboard.
Installation

Read more: Build a Stunning Black Walnut Coaster Set: The Ultimate Furniture Protector
Tips
- Ensure your miter saw is set to exactly 45 degrees to avoid gaps.
- Cut each pair of opposing sides of the frame to exactly equal lengths.
- Use a track saw, table saw, or circular saw for cutting the plywood backing.
- Prime the plywood before painting to prevent the wood grain from showing through.
- Use stop blocks on the router to ensure even keyhole depth.