Transform your living space with the rustic charm of oversized, handcrafted letters! Giant rustic letters are a fantastic way to add personality and a touch of handcrafted artistry to any room, from a cozy living area to a vibrant outdoor space. Whether you're spelling out a favorite word, initial, or even a whole phrase, these statement pieces are surprisingly easy to create with readily available materials, and the result is a truly unique decorative element that reflects your individual style. Forget expensive, mass-produced décor – embrace the satisfaction of creating something beautiful and personal with your own two hands.
This ultimate guide will walk you through each step of the process, from selecting your materials and designing your letters to the final touches that will make them truly shine. Get ready to unleash your creativity and discover how simple it is to build stunning, eye-catching giant rustic letters. Ready to get started? Let's dive into the detailed, step-by-step instructions below.
Preparation and Safety Guidelines
- Giant Stencils
- OSB Backerboard
- Jigsaw
- 150 Grit Sandpaper
- Orbital Sander
- 1x4 Cedar Boards (or Pallet Wood/Pine)
- Wood Glue (Tight Bond recommended)
- Brad Nailer with 1-inch Brad Nails
- Tres Bit Straight Cut Router Bit with Bearing
- Quarter Inch Roundover Router Bit
- 150/180 Grit Sandpaper
- Air Hose
- Stain
- Spray Finish (optional)
- Hangers (optional)
- Always wear safety glasses and a dust mask when cutting and sanding wood. Wood dust is harmful if inhaled.
- Use caution when operating power tools. Ensure proper ventilation and follow all manufacturer's safety instructions.
- If using stain or paint, work in a well-ventilated area and wear appropriate protective gloves and clothing. Always follow product instructions for safe handling and disposal.
Step-by-Step Instructions
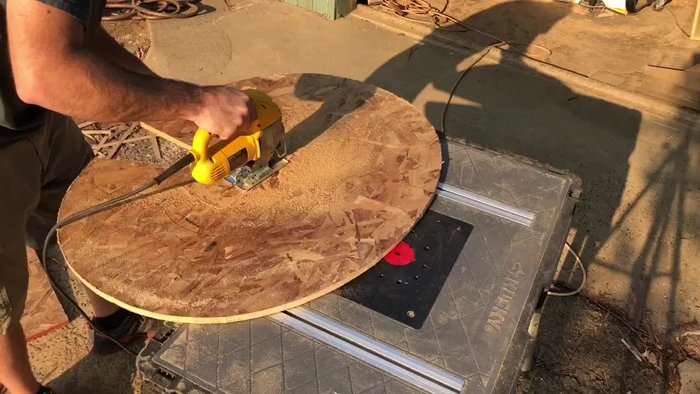
Create the Letter Shape
- Trace a giant letter onto your OSB backerboard using a stencil. Cut out the shape with a jigsaw.

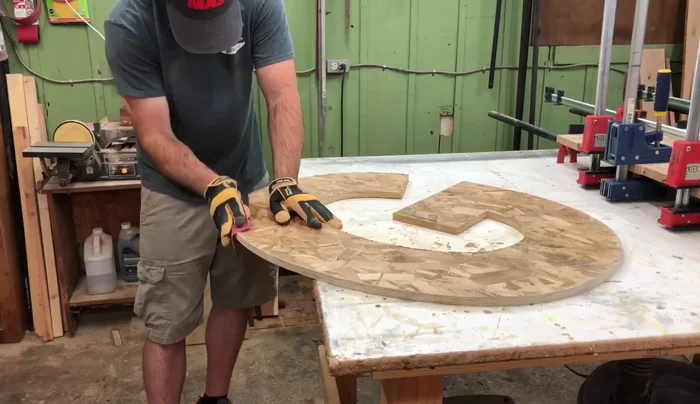
Create the Letter Shape Sand and Smooth
- Smooth the edges of the cut letter with 150-grit sandpaper to remove splinters and inconsistencies. Use an orbital sander for a smoother finish.
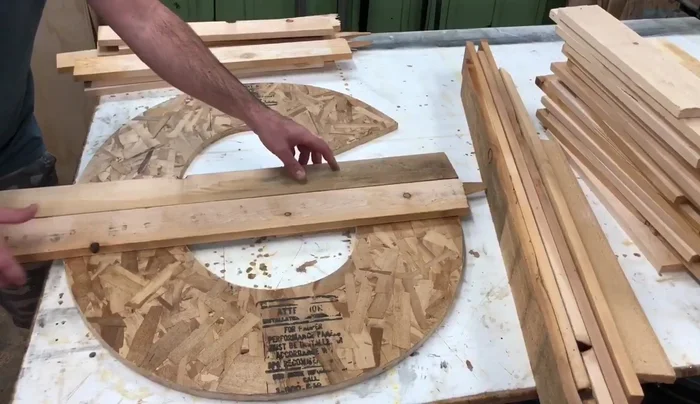
Sand and Smooth Prepare and Cut Slats
- Lay out 1x4 cedar boards (or your chosen wood) on the backer board to cover the entire letter shape.
- Flip the letter upside down. Place the letter back on top of the boards and trace around it. Trim the excess wood from the boards using a miter saw.
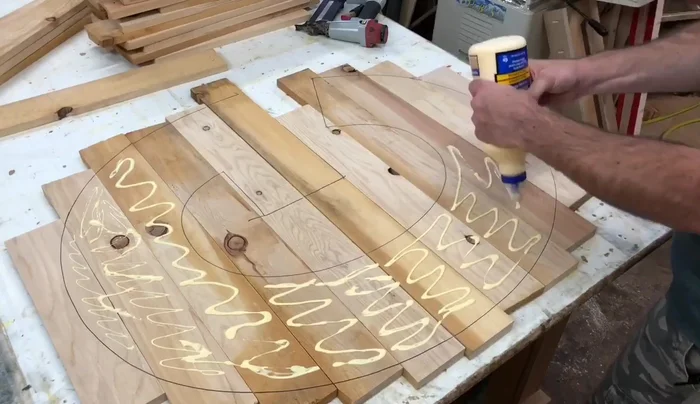
Prepare and Cut Slats Attach Slats
- Apply wood glue to the traced lines on the backer board. Place the boards on the glue, ensuring they align with the traced lines. Secure the boards using a brad nailer.
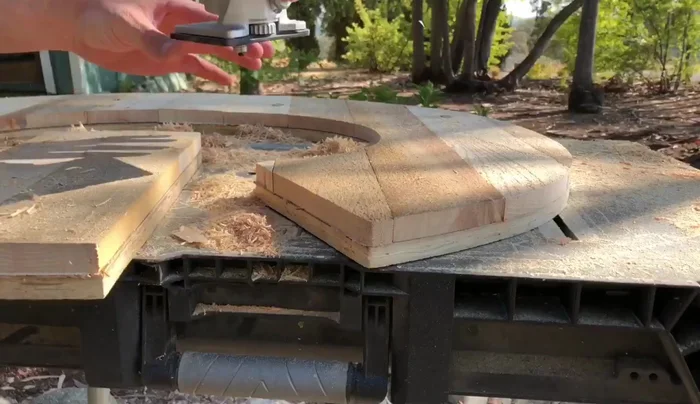
Attach Slats Trim the Front
- Use a straight cut router bit with a bearing to trim the front face of the letter, following the pattern of the backer board.
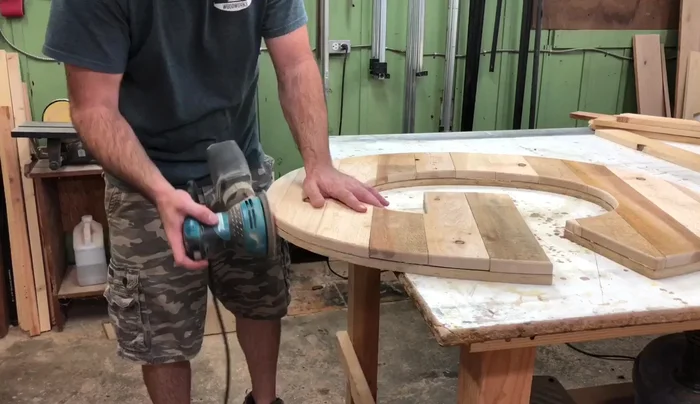
Trim the Front Round the Edges
- Use a quarter-inch roundover router bit to round the edges of the letter.
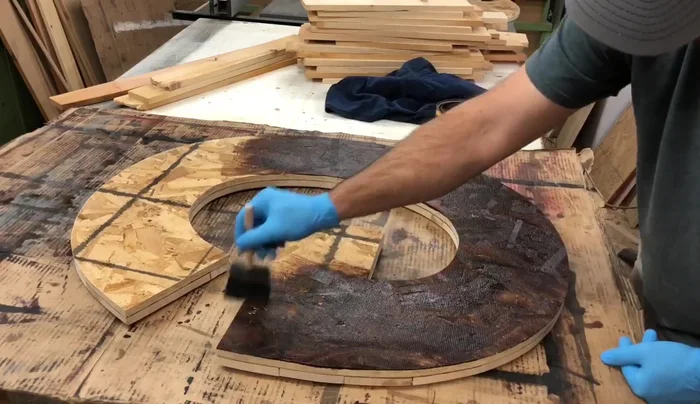
Round the Edges Sand, Clean, and Stain
- Sand any imperfections using sandpaper. Clean off dust and wood chips with an air hose.
- Apply stain to both the front and back of the letter, paying attention to cracks and crevices. Let the stain dry for at least 24 hours before applying a finish (optional).
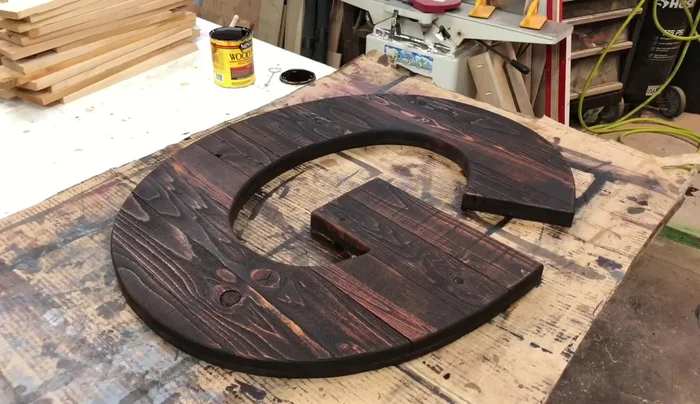
Sand, Clean, and Stain Finishing Touches
- Apply a spray finish if desired. Add hangers to the back for easy hanging.
Finishing Touches


Read more: Build a Stunning Black Walnut Coaster Set: The Ultimate Furniture Protector
Tips
- For a more professional look, use 3/4 inch plywood instead of OSB.
- When using a router, ensure the bit is pulling away from you for a safer and cleaner cut.
- Don’t rush the staining process; multiple coats might be needed, especially for OSB, to achieve full and even coverage.