Transform your bedroom into a cozy farmhouse haven with a stunning, handcrafted headboard! Forget overpriced furniture stores and embrace the rewarding experience of creating a unique piece that perfectly complements your personal style. A DIY farmhouse headboard is surprisingly achievable, even for beginners, offering a fantastic opportunity to add character and charm to your space without breaking the bank. The rustic aesthetic of a farmhouse headboard lends itself beautifully to various design styles, easily adaptable to fit any bedroom decor. This project allows for complete customization, letting you choose the perfect wood, size, and finishing touches to match your vision.
Ready to bring your farmhouse dreams to life? This step-by-step guide will walk you through each stage of the process, from selecting materials to adding those final, perfect details, ensuring you create a beautiful and functional headboard you'll be proud to display. Let's get started on building your dream headboard!
Preparation and Safety Guidelines
- 1x6 tongue and groove boards
- 1x6 standard boards
- circular saw
- wood glue
- paintbrush
- brad nails
- screws
- countersink bit
- 1x3 board
- two 2x4s
- sandpaper (120 grit and 240 grit)
- polyurethane
- Always wear safety glasses and a dust mask when cutting and sanding wood to protect your eyes and lungs from debris.
- Use caution when handling power tools. Ensure they are properly plugged in, and follow all manufacturer safety instructions. If unsure, seek assistance from someone experienced with the tools.
- Ensure the headboard is securely attached to the bed frame to prevent it from falling and causing injury.
Step-by-Step Instructions
Prepare Headboard Frame
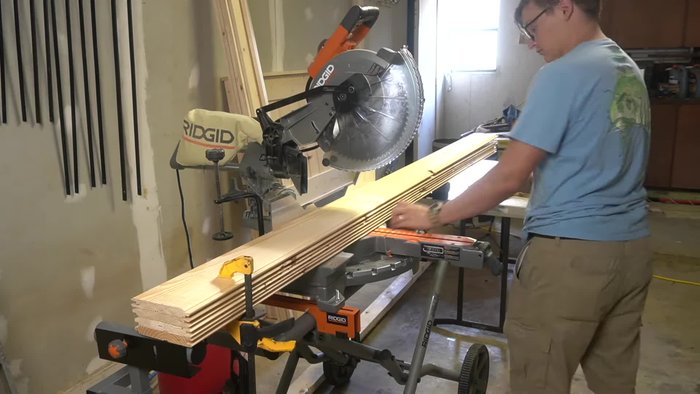
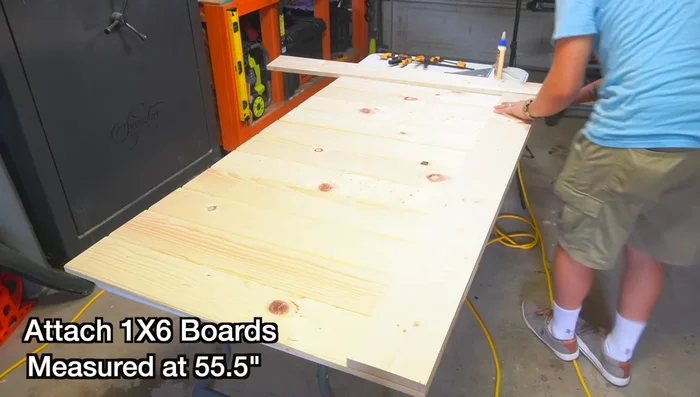
- Cut 1x6 tongue and groove and 1x6 standard boards to the required dimensions for your headboard. Measurements are provided in the video description, adjust for your bed size.
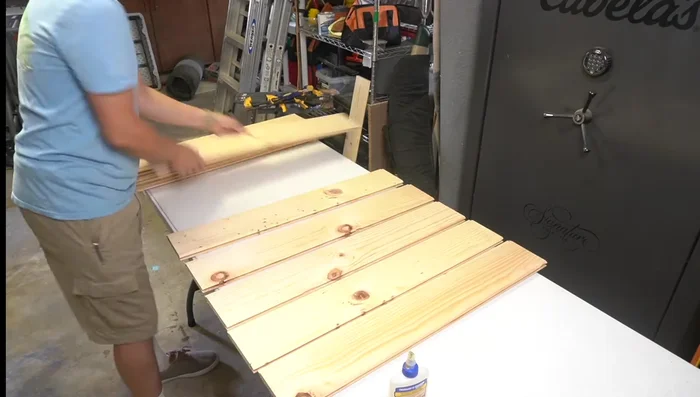
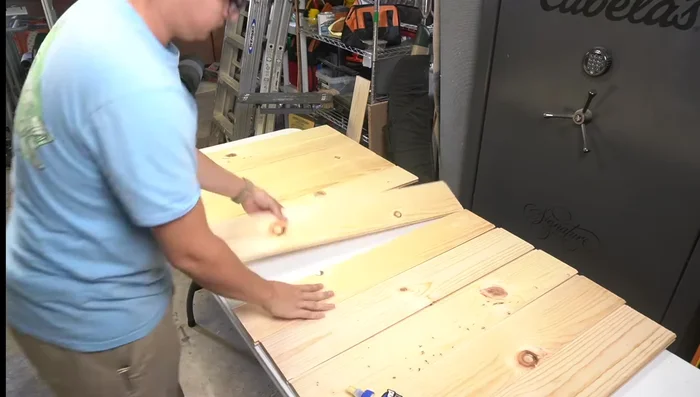
- Lay out the tongue and groove boards and apply wood glue to the tongues.
- Assemble the tongue and groove boards, ensuring complete glue coverage for a strong bond.
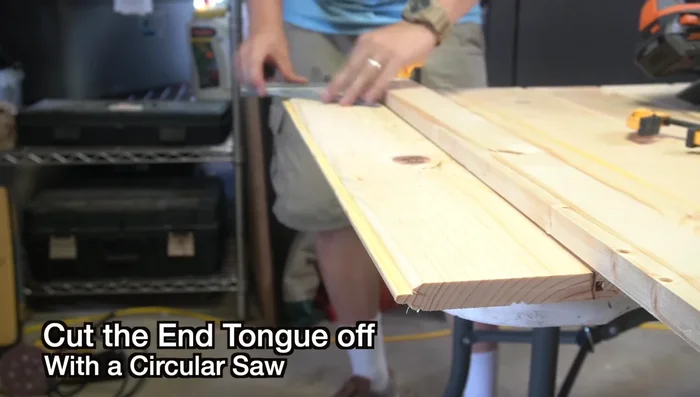
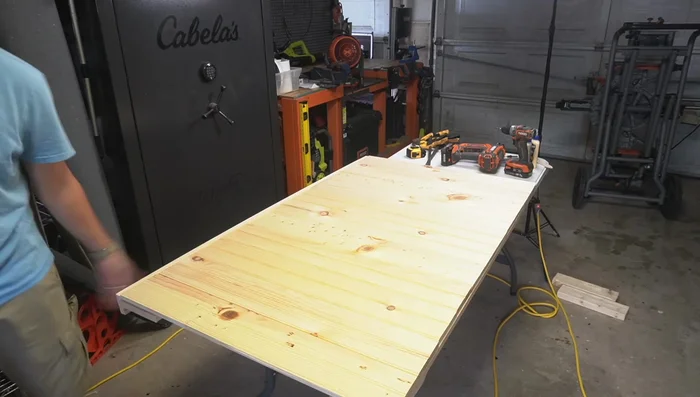
- Cut off the end tongue of the final glued board to create a flush surface for attaching other components.

Prepare Headboard Frame Attach Facing Boards
- Attach the 1x6 standard boards to the front of the headboard using wood glue and brad nails for a clean look.
Attach Facing Boards Add Support and Back
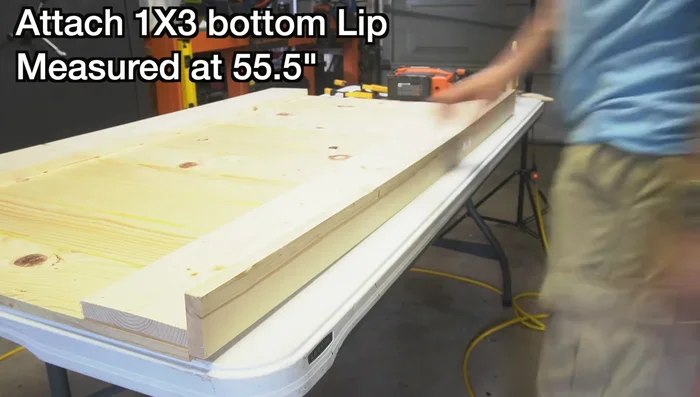
- Attach the 1x3 bottom board to the headboard using wood glue and screws (screws are hidden from view).
- Attach the 1x6 back slats using wood glue and screws.
Add Support and Back Assemble and Prepare Legs
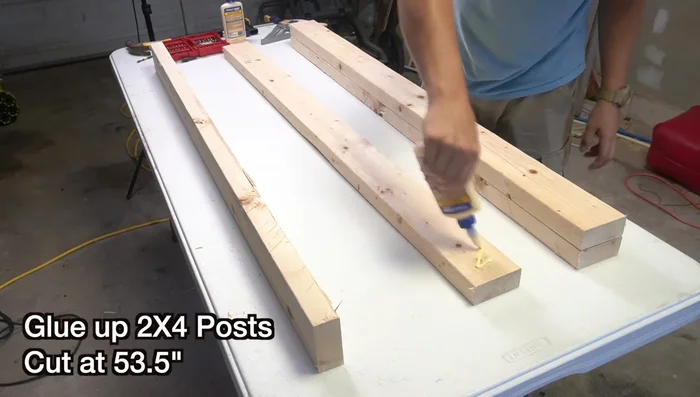
- Assemble the legs using two 2x4s for each leg (sandwiched together), gluing and screwing them securely for added strength.
- Sand the legs to smooth out any sharp edges.
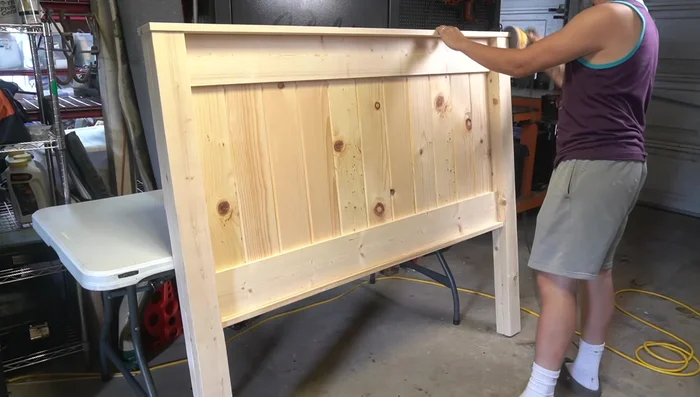
Assemble and Prepare Legs Attach Legs and Top Cap
- Attach the legs to the headboard, ensuring the top of the legs are flush with the top of the headboard.
- Attach the top cap (1x4 board) using brad nails and screws.
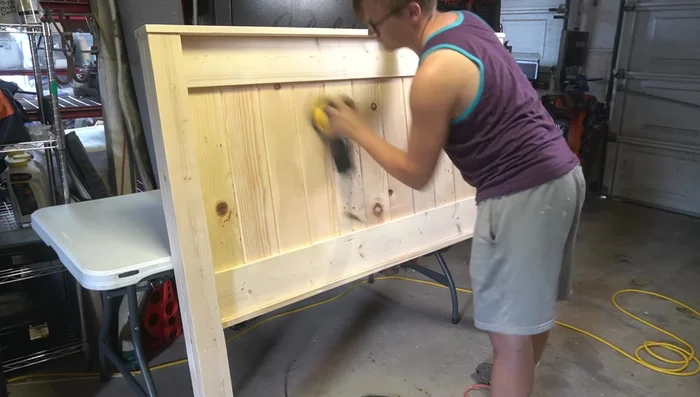
Attach Legs and Top Cap Sand and Finish
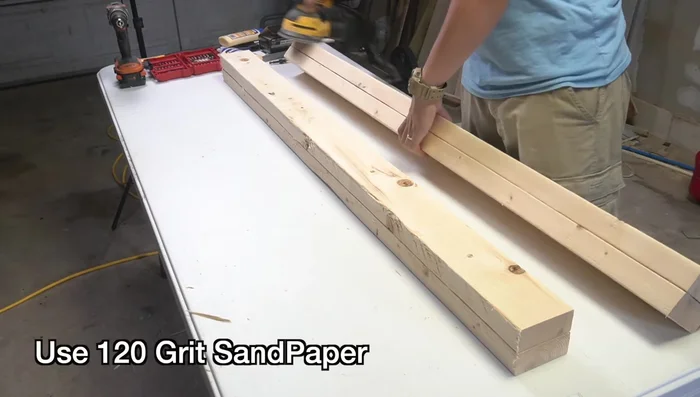
- Sand the entire headboard using 120 and then 240 grit sandpaper for a smooth finish.
- Seal the headboard with a few coats of polyurethane (optional).
Sand and Finish

Read more: Build a Stunning Black Walnut Coaster Set: The Ultimate Furniture Protector
Tips
- Use a countersink bit when screwing into the boards to avoid splitting the wood and maintain a smooth finish.
- Leave a two-inch lip on each side of the back slats for attaching the legs.
- Ensure all boards are flush to create a professional look.