Tired of clutter taking over your living space? Maximize your vertical real estate and create stunning, functional storage with DIY cube shelves! This simple woodworking project allows you to customize the size, finish, and number of cubes to perfectly match your needs and style, offering a stylish and affordable alternative to expensive pre-made shelving units. Whether you're looking to organize books, display collectibles, or simply add a touch of modern aesthetic to a room, cube shelves are a versatile solution that offers incredible value.
Imagine transforming a bare wall into a visually appealing and highly functional storage area, all with readily available materials and basic tools. This guide provides a comprehensive step-by-step process to build your own custom cube shelves, leading you from selecting the right wood to the final staining and finishing touches. Get ready to unlock the untapped potential of your wall space and say goodbye to cluttered surfaces!
Preparation and Safety Guidelines
- 1x5 boards
- 1x10 board (optional)
- table saw (optional)
- wood screws (2 inch or 1.5 inch)
- drill
- countersink bit
- wood filler
- sandpaper
- paint
- keyhole hangers
- Always use appropriate safety glasses and a dust mask when cutting and sanding wood. Wood dust is harmful if inhaled.
- Ensure all screws and brackets are securely fastened to prevent the shelf from collapsing. Overtightening can cause wood to split, so use even pressure.
- Properly secure the shelves to wall studs for maximum support. Do not rely solely on drywall anchors, especially for heavier items.
Step-by-Step Instructions
Prepare the Wood
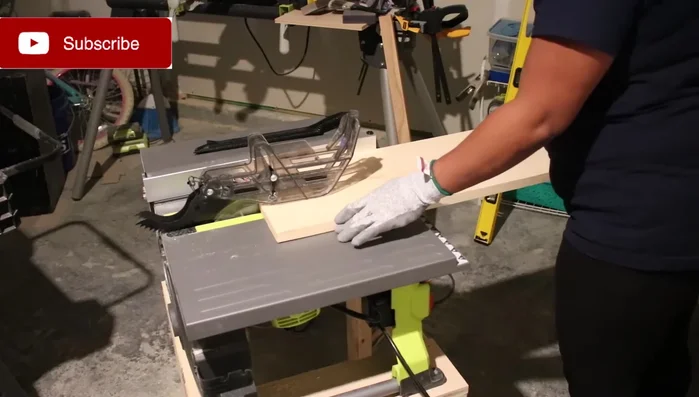
- Cut four 12-inch pieces from 1x5 boards or a 1x10 board. For a 13-inch cube, cut the boards 1 inch shorter than your desired final size.

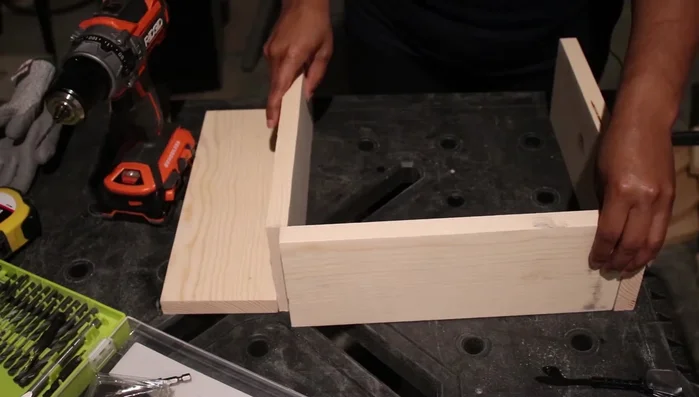
Prepare the Wood Assemble the L-Shapes
- Alternate the ends of the boards to create two L-shapes.
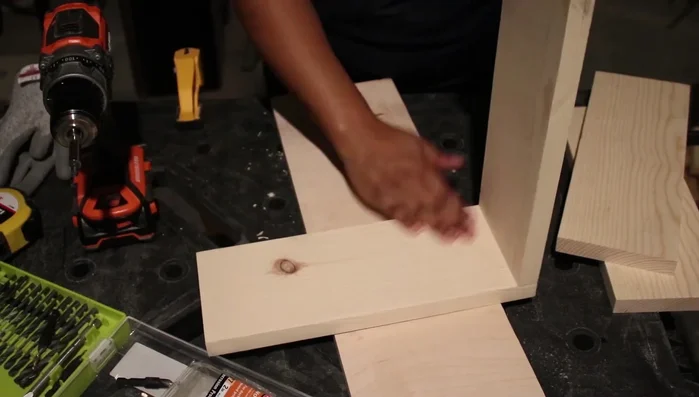
- Secure the butt joints using two screws per joint. Pre-drill pilot holes and use a countersink bit for a flush finish. (Optional: add wood glue).
Assemble the L-Shapes Connect the L-Shapes to form a Cube
- Connect the two L-shapes to form a square cube.
Connect the L-Shapes to form a Cube Finish the Shelves
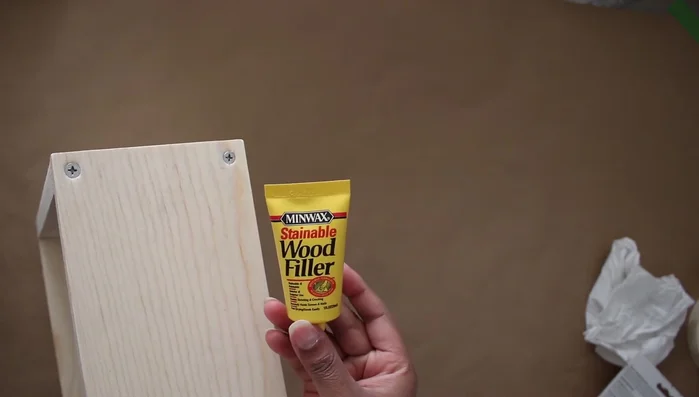
- Fill screw holes with wood filler, sand smooth, and paint.
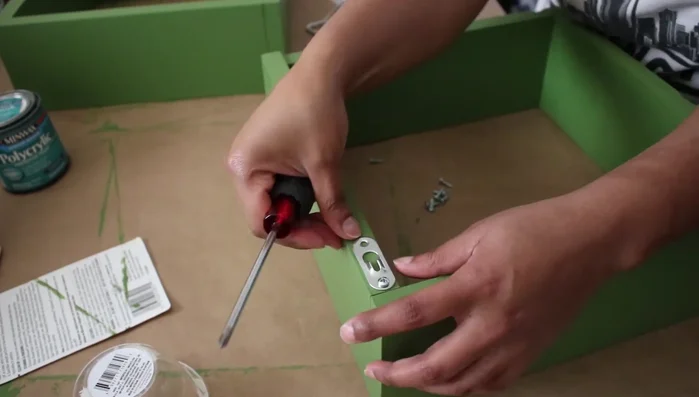
Finish the Shelves Install Hanging Hardware
- Attach keyhole hangers to the back of each shelf for easy hanging.
Install Hanging Hardware

Read more: Build a Stunning Black Walnut Coaster Set: The Ultimate Furniture Protector
Tips
- Consider pre-drilling pilot holes to make attaching the second board easier and quicker.
- Optional: Use wood glue at the connection points for added strength.