Jewelry making offers a fantastic outlet for creativity and self-expression, allowing you to craft unique pieces that perfectly reflect your personal style. Among the many captivating techniques, wire wrapping with beads provides a surprisingly accessible path to creating stunning, sophisticated jewelry. This tutorial focuses on a particularly elegant and simple project: a delicate beaded wire ring. This technique, perfect for beginners and experienced crafters alike, allows for beautiful customization with your favorite beads and wire colors.
With minimal materials and tools, you can fashion a ring that's both chic and remarkably easy to make. Forget expensive designer pieces – let's dive into the step-by-step instructions below and learn how to create your own gorgeous beaded wire ring. You'll be surprised by how quickly and easily you can transform simple materials into a piece of wearable art you'll cherish.
Preparation and Safety Guidelines
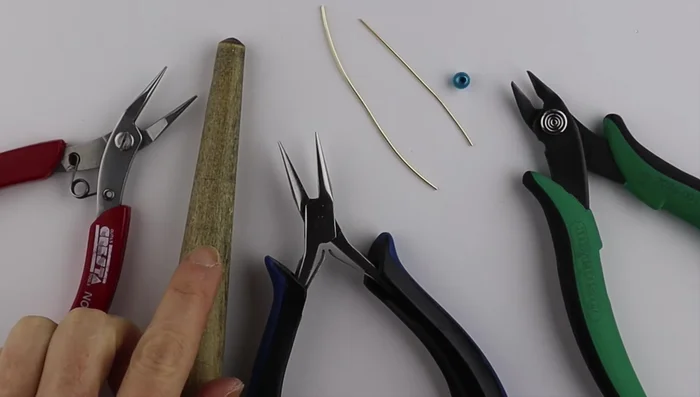
- Flat pliers
- Cutters
- Round pliers
- Ring cone
- 18 gauge wire
- 20 gauge wire
- Bead (6mm, 8mm, or 4mm)
- Always use wire cutters specifically designed for jewelry making. Household scissors can damage the wire and potentially injure you.
- Be mindful of sharp wire ends. File or crimp down any sharp edges after cutting to prevent accidental scratches or pokes.
- Avoid wearing the ring while sleeping, showering, or engaging in activities that could cause it to snag or bend.
Step-by-Step Instructions
Prepare the Wire Base
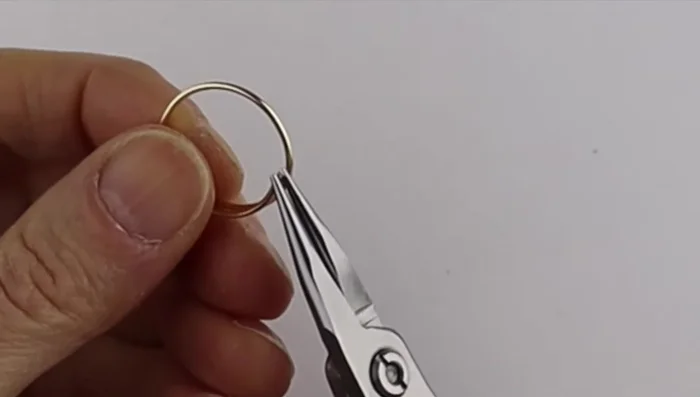
- Prepare the 18 gauge wire by winding it around the ring cone to your desired size. Ensure one end is cut flush.
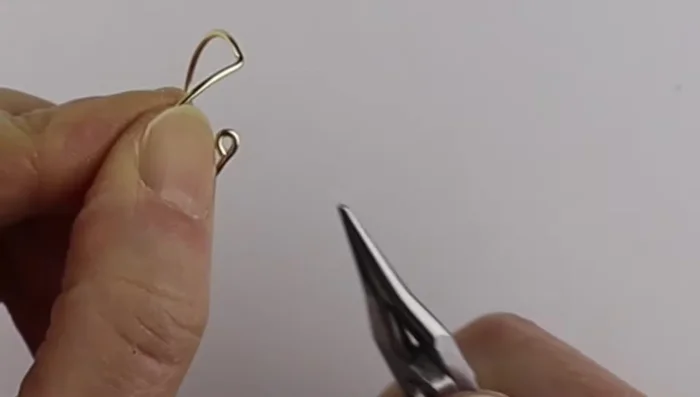
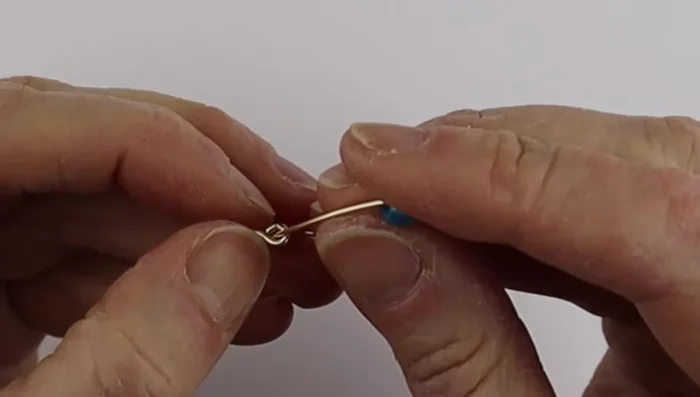
- Use round pliers to hold the flush end and create a closed loop.
- Bend the other end of the 18 gauge wire to the opposite direction and create another loop, aiming for similar sizes.
- Clip the excess wire flush and flatten the loops to make them comfortable to wear.

Prepare the Wire Base - Place the ring back on the cone to straighten it.
Prepare the Bead
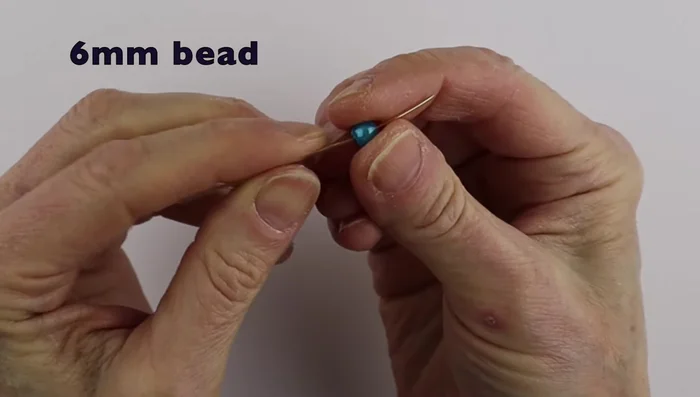
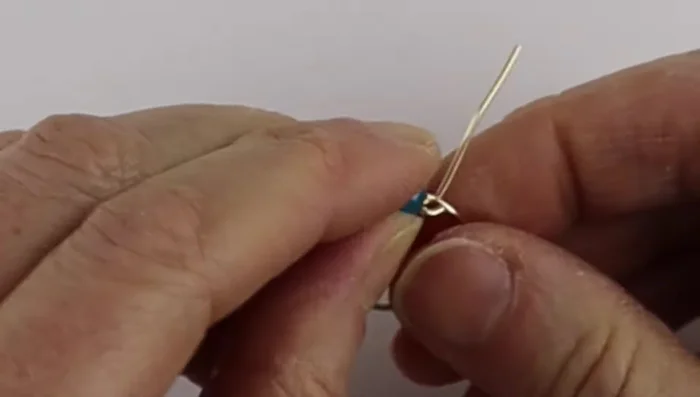
- Take your 20 or 22 gauge wire and add your chosen bead in the center. Bend the wire down on both sides to secure the bead.
Prepare the Bead Attach the Bead to the Wire Base
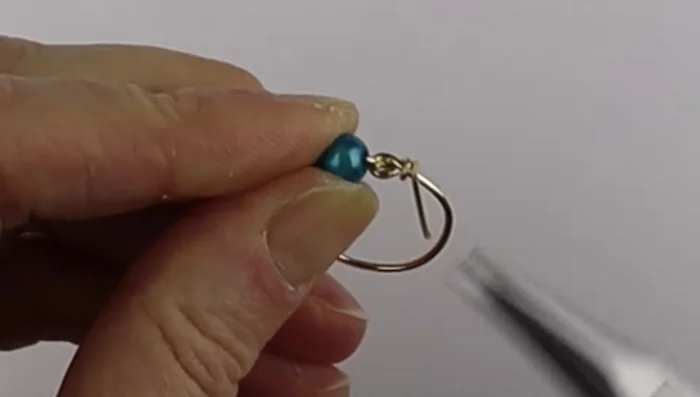
- Push the ends of the thinner wire through the loops of the 18 gauge wire, ensuring the bends align with the wire exits.
- Bend the ends of the thinner wire to one side each, making sure the bead sits snugly within the 18 gauge wire.
Attach the Bead to the Wire Base Secure the Bead
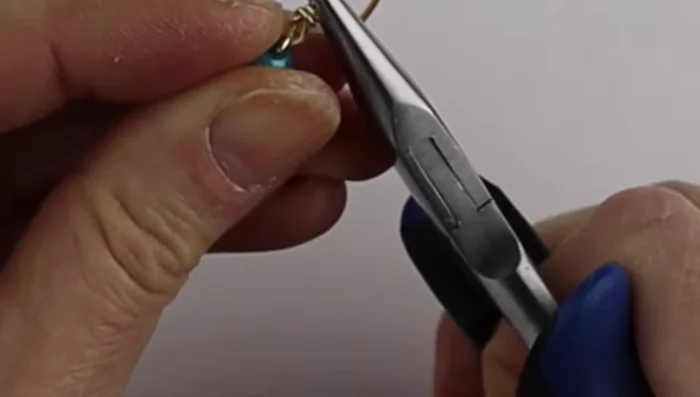
- Use flat pliers to wrap the thinner wire around the 18 gauge wire three times on each side, tightening securely but avoiding breakage.
- Tighten the ends by gently turning and pinching them.
- Place the finished ring back on the ring cone for final shaping.
Secure the Bead
Read more: DIY Tiered Tassel Earrings: A Quick & Easy Jewelry Tutorial
Tips
- You can use different gauge wires (22 or even 24 gauge) for the bead attachment. Experiment to find your preference.
- Various metals can be used; Argentium silver is recommended for its tarnish resistance.
- Ensure the loops on the 18 gauge wire are relatively the same size for balance and aesthetic appeal.