Are you ready to unleash your inner artisan and craft some stunning, eye-catching jewelry? This tutorial will guide you through the process of creating a unique aluminum pendant and matching double swirl earrings, perfect for adding a touch of modern elegance to your style. We'll be using readily available materials and techniques that are surprisingly easy to master, even for beginners. Forget expensive, mass-produced accessories – let’s embrace the satisfying creativity of DIY! The "go-with-the-flow" design encourages a relaxed, organic aesthetic, allowing for individual expression in your finished pieces.
This project uses the fluidity of aluminum to create intriguing shapes, resulting in lightweight and comfortable jewelry. Prepare to be amazed by how simple it is to transform humble aluminum sheets into beautiful, wearable art. From shaping the metal to adding a polished finish, every step is clearly explained, ensuring a successful and enjoyable crafting experience. Let's dive into the step-by-step instructions and start crafting your own mesmerizing aluminum pendant and earrings!
Preparation and Safety Guidelines
- Round nose pliers
- Nippers
- Nylon coated pliers
- Dowel (optional)
- 3mm rat tail (necklace)
- Chasing hammer
- Bench block (earrings)
- Always wear safety glasses when sawing, filing, or sanding aluminum. Metal shards can cause serious eye injuries.
- Use proper ventilation when working with aluminum, especially when sawing or sanding. Aluminum dust can be irritating to the lungs.
- Handle aluminum wire carefully to avoid cuts. The wire can be sharp and potentially cause injury.
Step-by-Step Instructions
Prepare Aluminum Wires for Pendant
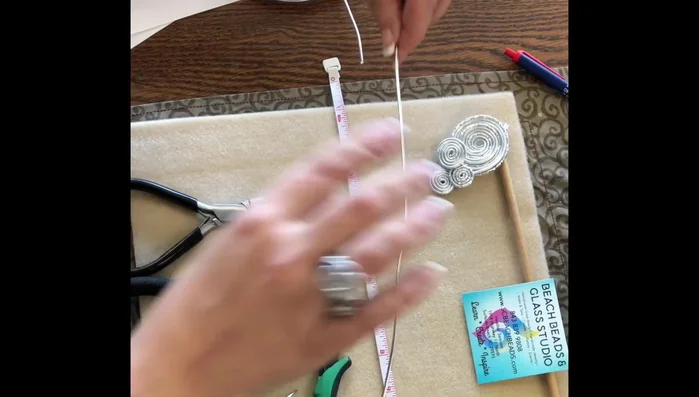
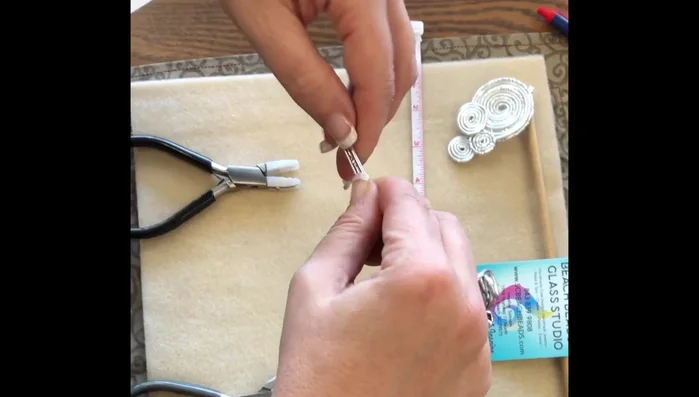
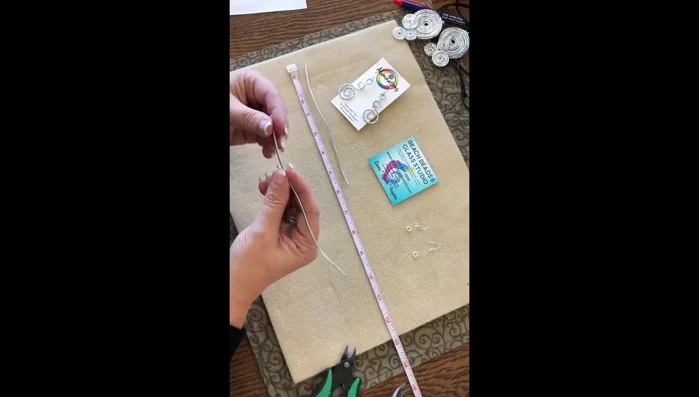
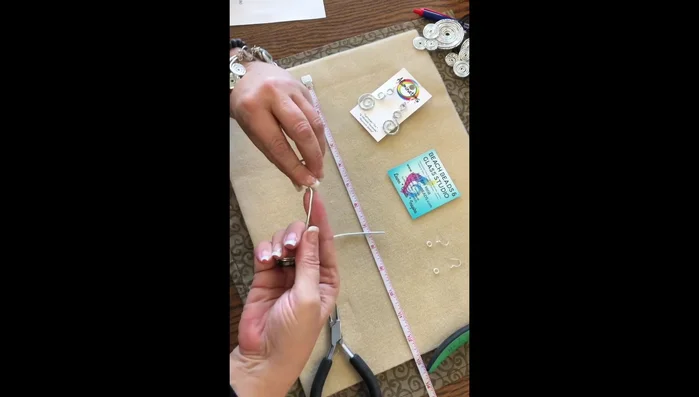
- Cut three 16-inch pieces of 12-gauge aluminum wire. Use the first piece to measure the rest.
- Ensure all wire ends have a flush cut using nippers.
- Evenly align the three wires.

Prepare Aluminum Wires for Pendant Create Pendant Swirl Base
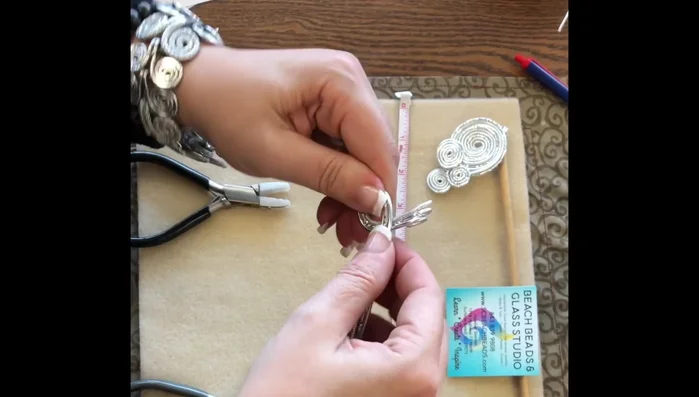
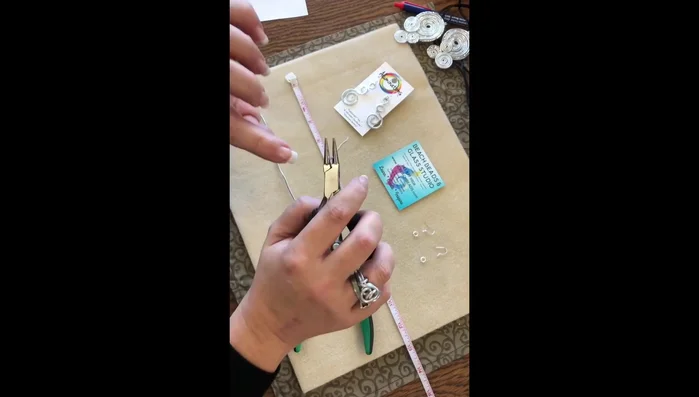
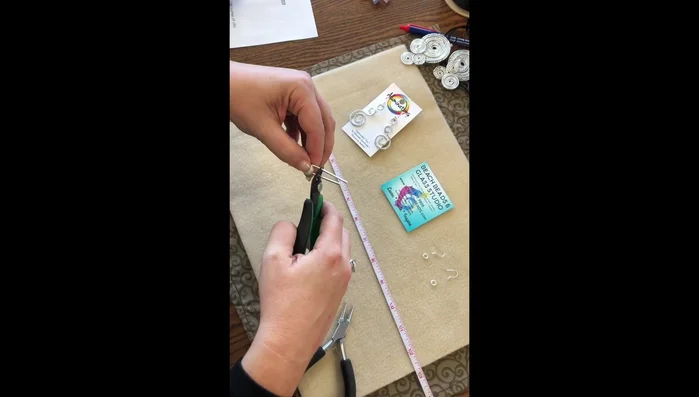
- Create a substantial loop at one end of each wire using round nose pliers.
- Bend the wires at a 90-degree angle below the loops. Use nylon coated pliers to flatten and keep the wires flat while tightening the loop.
- Bring one wire across the front, holding everything flat. Tighten the loop by pulling on both sides, keeping the wires flat using nylon-coated pliers.
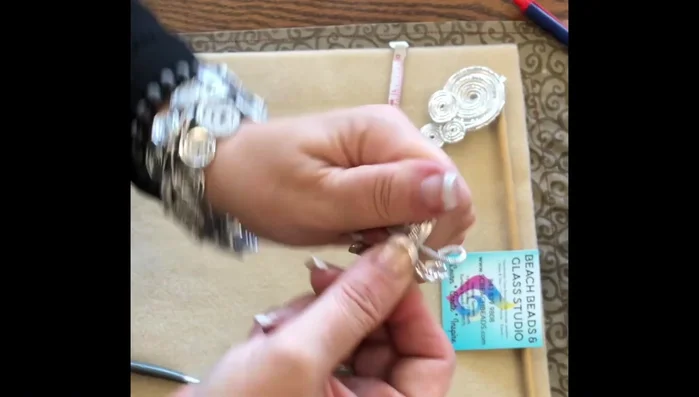
- Continue rolling and flattening the wires, creating a swirl pattern. Keep pulling on both sides to maintain a flat shape.
Create Pendant Swirl Base Shape and Secure Pendant Loops
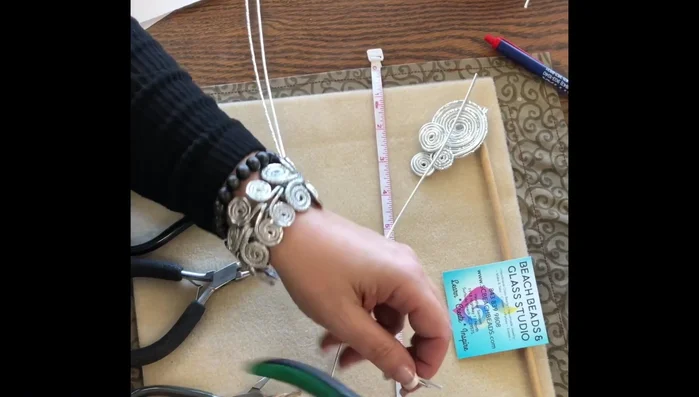
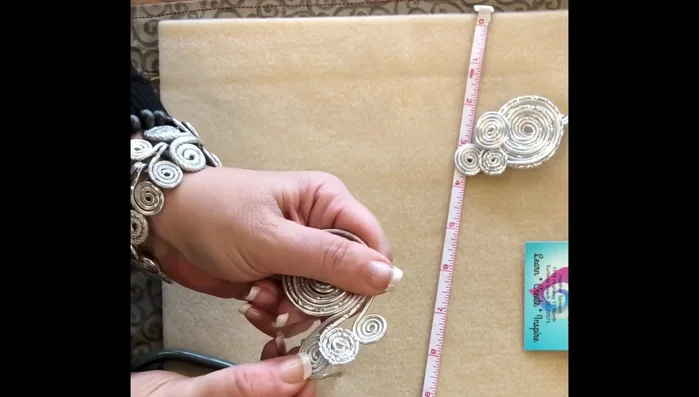
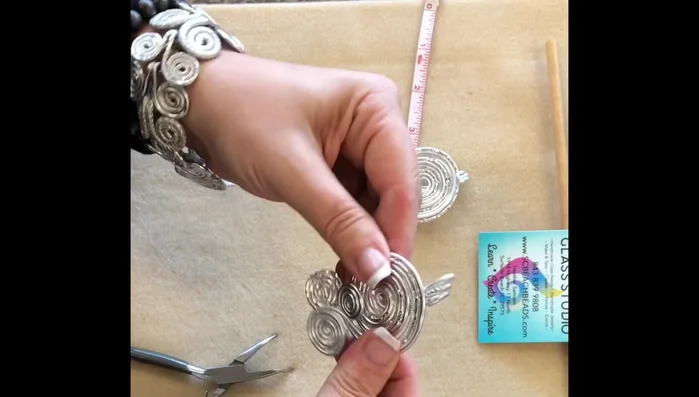
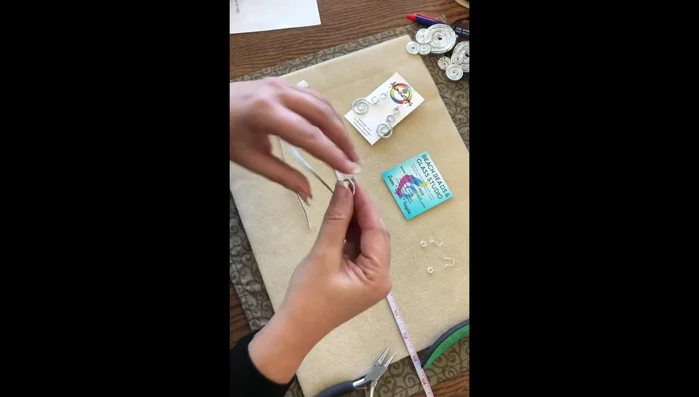
- Create small loops at the end of each individual wire using round nose pliers and curl them up slightly.
- Arrange the loops to create the desired three-swirl pattern. The placement can be adjusted.
Shape and Secure Pendant Loops Finish Pendant
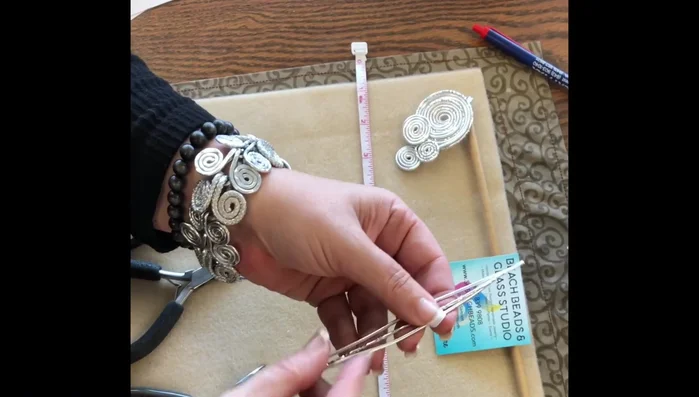
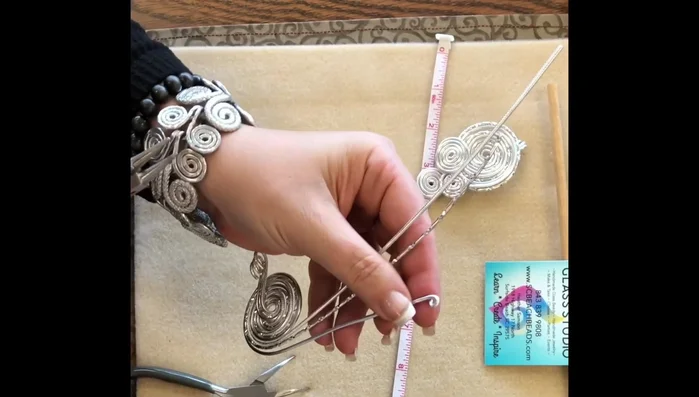
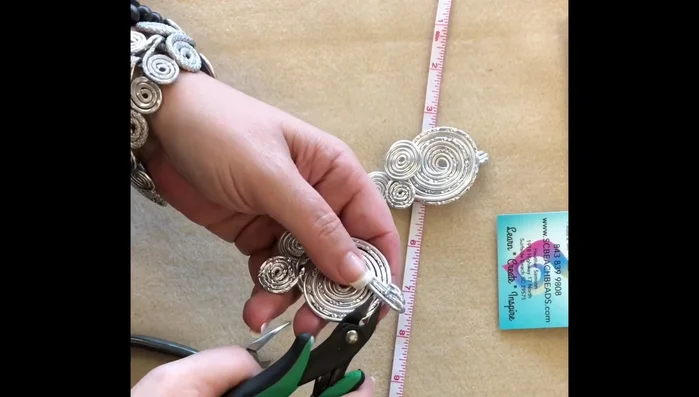
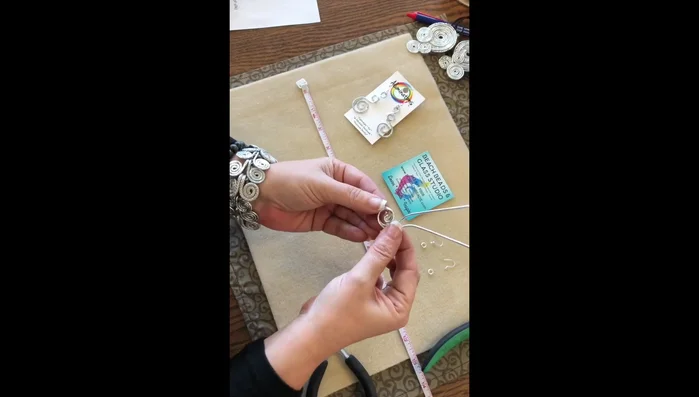
- Center and flatten the bail. Trim the excess wire from the bail.
- Close the bail loop. If a larger hole is needed, use a dowel to shape the wire.
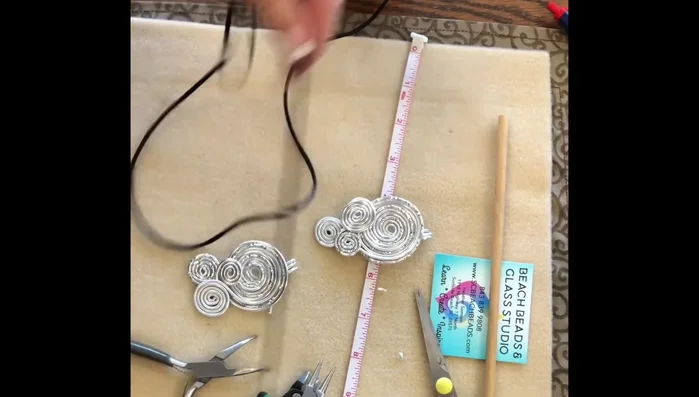
- Cut 36 inches of 3mm rat tail and thread it through the loops of the pendant. Tie a knot and cinch it down to secure the pendant.
Finish Pendant Prepare Aluminum Wires for Earrings
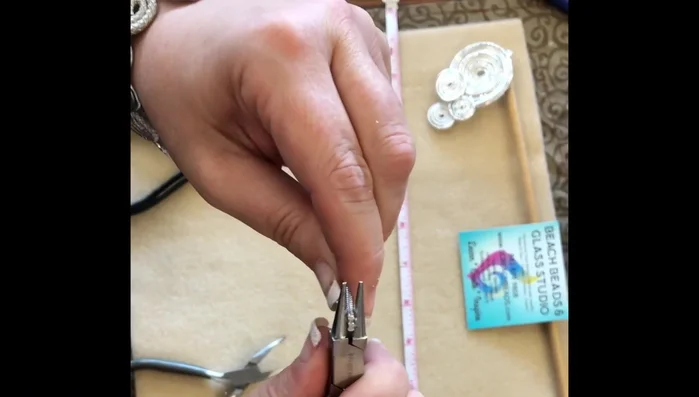
- Cut two 6-inch pieces of aluminum wire for the earrings. Remove any kinks and flush cut the ends.
Prepare Aluminum Wires for Earrings Create First Swirl on Earrings
- Using round nose pliers, create a 'J' shape at one end of each wire, then continue turning to create the first swirl. Keep the pliers close to the working area to target the swirl and avoid unnecessary movement.
Create First Swirl on Earrings Create Second Swirl and Matching Loops
- Create a second matching swirl on each earring. Check frequently for symmetry while making each step.
- Make a slight bend in both wires and position them to face the same direction. Then press and pull the wire, shaping it into a loop.
- Create a second matching loop on each earring. Adjust and refine the shape until both earrings match perfectly.
Create Second Swirl and Matching Loops Shape and Finish Earrings
- Trim the excess wire, leaving about an inch from the top of the swirls. Shape the bottom loop using round nose pliers and bench block.
Shape and Finish Earrings Attach Earring Findings
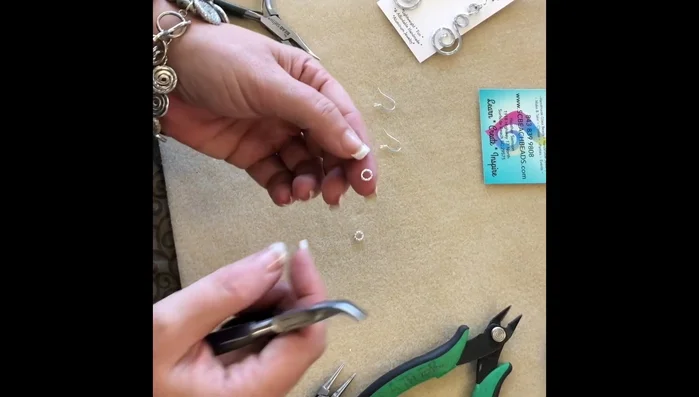
- Use a 6mm jump ring to attach earring findings, ensuring the pointy end of the earring faces away from the front.
Attach Earring Findings
Read more: DIY Tiered Tassel Earrings: A Quick & Easy Jewelry Tutorial
Tips
- Use nylon coated pliers to help keep the wires flat while making the pendant.
- Don't pull too hard on the wire while rolling to avoid overlapping.
- To create uniform earrings, build them one step at a time, making sure each step is identical on both earrings.
- Keep the pliers close to the working area while shaping the swirls to control movement and precision.
- When closing jump rings, press tension towards the center to avoid gaps and ensure a secure closure.