Are you ready to add a touch of handmade charm to your reading experience? This easy crochet bookmark tutorial will guide you through creating a delightful star stitch bookmark, perfect for bookworms of all skill levels. Forget boring, store-bought bookmarks; this project is a quick and satisfying way to personalize your favorite books and show off your burgeoning crochet skills. The star stitch, while visually impressive, is surprisingly simple to master, making this an ideal project for beginners eager to expand their crochet repertoire or experienced crocheters seeking a fun, quick craft.
This charming star stitch bookmark is not only functional but also a beautiful accessory. The textured pattern adds visual interest, and the relatively small size makes it a fast project, perfect for completing in a single evening. Ready to get started on your own star-shaped reading companion? Let’s dive into the step-by-step instructions below!
Preparation and Safety Guidelines
- worsted weight yarn
- crochet hook
- yarn needle
- scissors
- straight pins
- spray bottle or steamer
- cardboard (for tassel)
- Always use sharp scissors to cut your yarn to prevent fraying and ensure clean edges on your bookmark.
- Be mindful of your tension throughout the project. Inconsistent tension can lead to an uneven and less aesthetically pleasing bookmark.
- If using a hook size different from the pattern's recommendation, test a small swatch first to ensure the star stitch comes out as desired. Hook size affects the overall size and look of the stitch.
Step-by-Step Instructions
Beginning the Bookmark
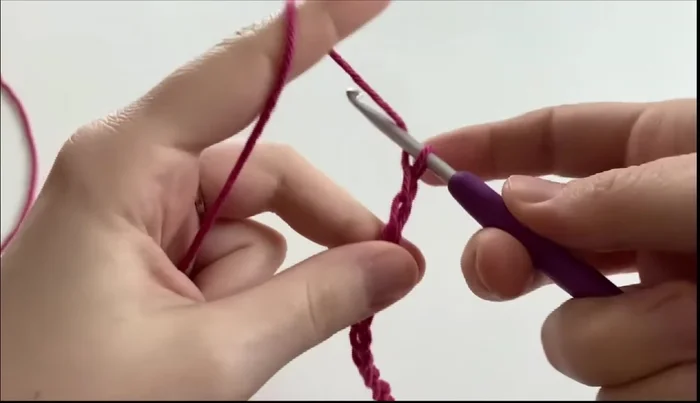
- Make a slip knot and place it on your hook, then tighten it.
- Chain 33 (or a multiple of 2 + 5 for desired length).
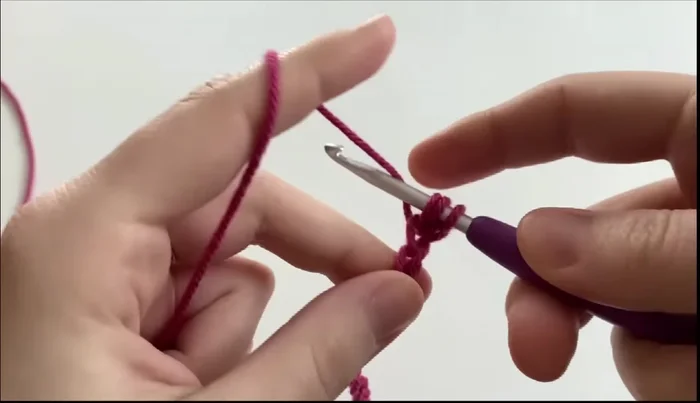
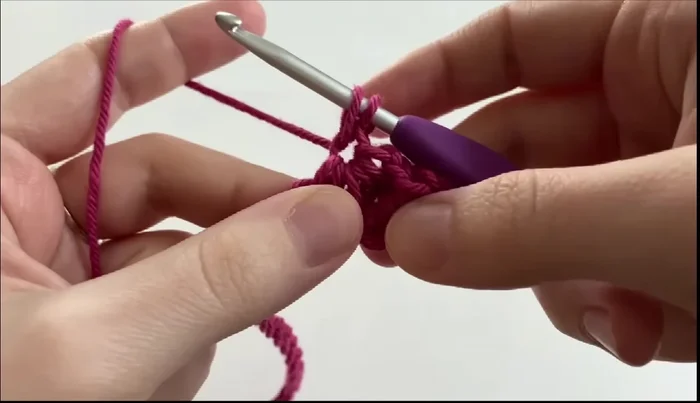
Creating the First Star Stitch
- Yarn over and insert hook into the second chain from the hook. Yarn over and pull up a loop (3 loops on hook).
- Continue working single crochet stitches, increasing to 4, 5, and then 6 loops on the hook before pulling through all 6 loops and chaining 1.
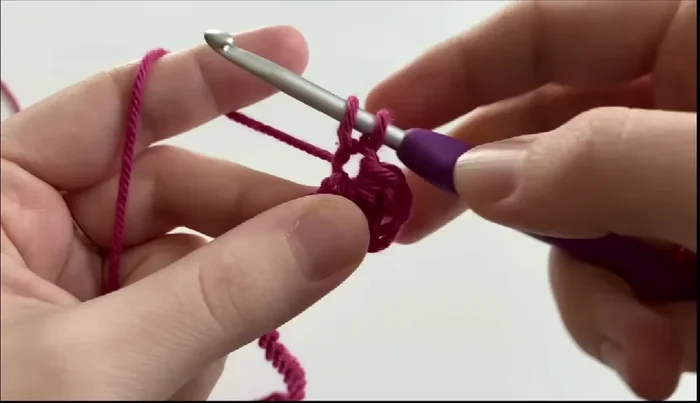
- Start the next stitch in the chain-1 space (eye) of the last stitch. Yarn over, pull up a loop. Insert hook under the last leg of the stitch, yarn over, pull up a loop. Insert hook into the space, yarn over, pull up a loop. Repeat in the next two chains.
- Repeat step 5 until you have six loops, then yarn over and pull through all six loops and chain one to finish the star stitch.

Creating the First Star Stitch Completing Row 1
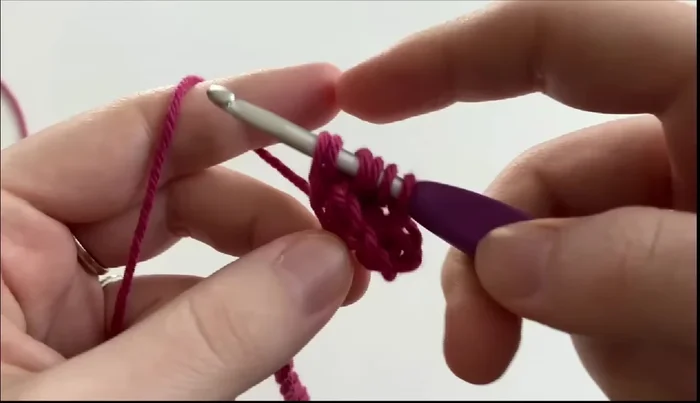
- Repeat the star stitch pattern across the row. There will be two chains remaining at the end of the row. Complete the last stitch the same way, ending with a chain one.
Completing Row 1 Completing Row 2
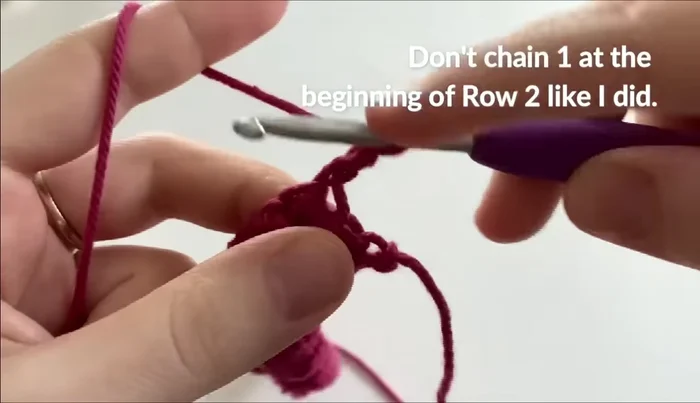
- Turn your work and begin row two. Make one single crochet directly into the eye of the last stitch and another single crochet into the last part of the stitch. For each subsequent stitch, work two single crochets into the eye.
- Repeat step 8 across the row.
Completing Row 2 Finishing the Crochet
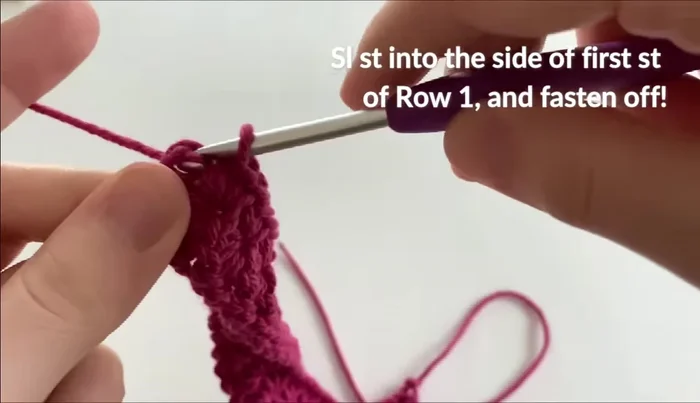
- To fasten off, insert hook into the side of the first stitch of row one and make a slip stitch. Fasten off and trim the tail, pulling it tight.
- Weave in the ends.
Finishing the Crochet Making the Tassel
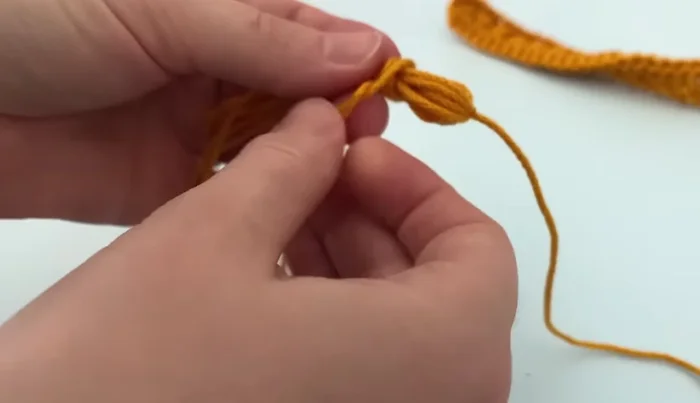
- Wrap yarn around a 2.5-3 inch object 7 times. Secure with a new piece of yarn using a double knot. Cut along the bottom edge to release. Cut working yarn.
- Wrap a new piece of yarn around the tassel 3-4 times and secure with a double knot. Trim the tail.
Making the Tassel Attaching the Tassel
- Thread a yarn needle, insert it into the top of the bookmark, secure with a double knot, and weave in the end.
Finishing Touches
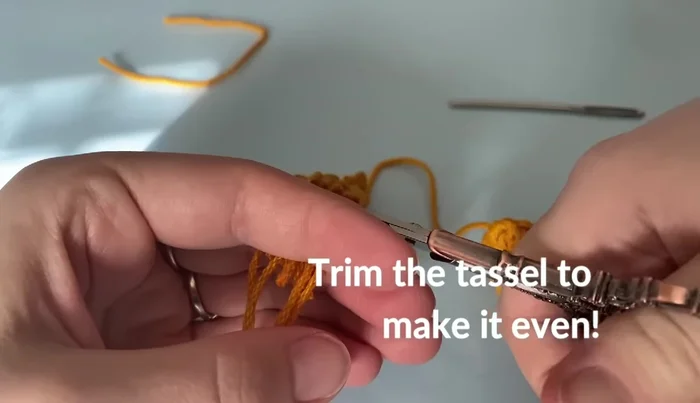
- Trim the bookmark to make it even.
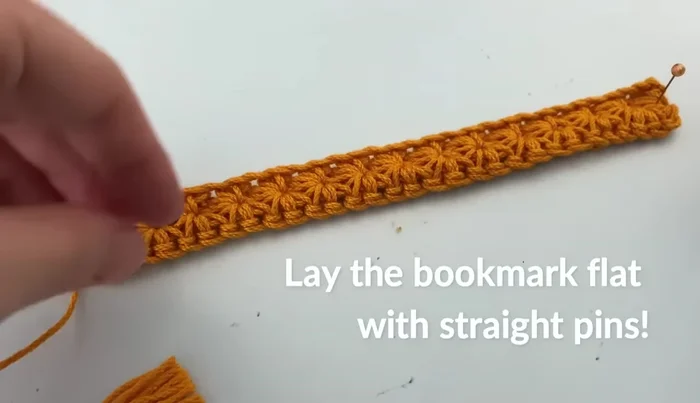
- Use straight pins to stretch the bookmark, making it straight. Use a spray bottle or steamer to dampen the fabric, keeping the steamer 1-2 inches away. Gently pat the water or steam into the fabric. Remove pins once dry.
Finishing Touches
Read more: Easy Color Block Crochet Blanket Tutorial for Beginners
Tips
- For a longer or shorter bookmark, chain a multiple of two and add five chains.
- Don't chain one at the beginning of row two; make a single crochet into the eye of the last stitch.