Are you ready to ditch the plastic and embrace a sustainable lifestyle, one stylish stitch at a time? This beginner-friendly crochet market bag tutorial will guide you through creating your own reusable, eco-conscious shopping companion. Forget complicated patterns and endless hours of frustrating work – this project is designed for absolute beginners, requiring minimal crochet experience and utilizing a simple, yet effective stitch. Imagine the satisfaction of carrying your groceries in a bag you made yourself, knowing you're contributing to a greener future.
This quick and easy pattern allows you to whip up a beautiful and functional market bag in a surprisingly short amount of time. Using readily available materials, you'll learn the basics while crafting a practical everyday item. Ready to get started on your eco-friendly crochet journey? Let's dive into the step-by-step instructions and create your own stunning market bag!
Preparation and Safety Guidelines
- Cotton yarn
- 5mm crochet hook
- Scissors
- Yarn needle
- Stitch markers
- Crochet ring (optional)
- Use sharp scissors to avoid accidental cuts or snags while cutting yarn. Keep your fingers clear of the hook and scissors while working.
- Always check your tension throughout the project to maintain consistent stitch size and prevent bag distortions. Loose tension can lead to a floppy bag, while tight tension can cause discomfort when carrying items.
- When working with a reusable shopping bag, ensure the yarn is strong enough to hold the anticipated weight of your groceries. Avoid using extremely thin or delicate yarns for heavy use.
Step-by-Step Instructions
Create the base
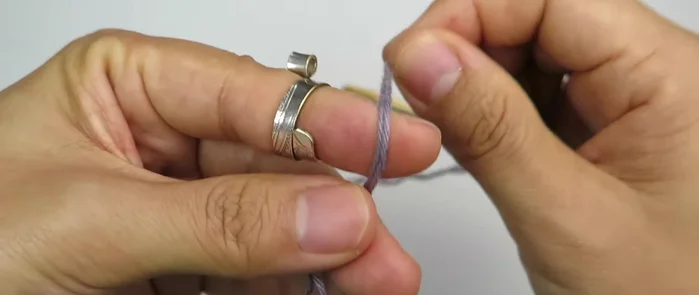
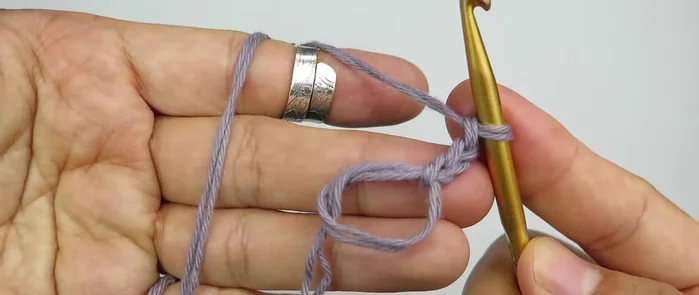
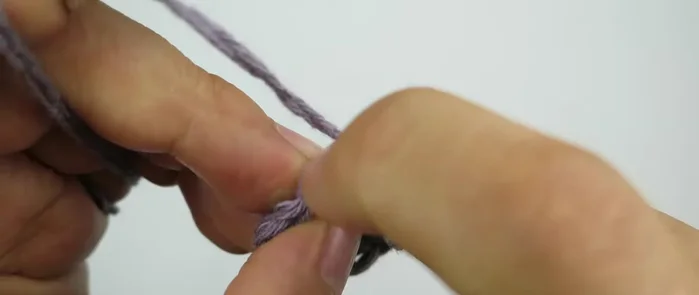
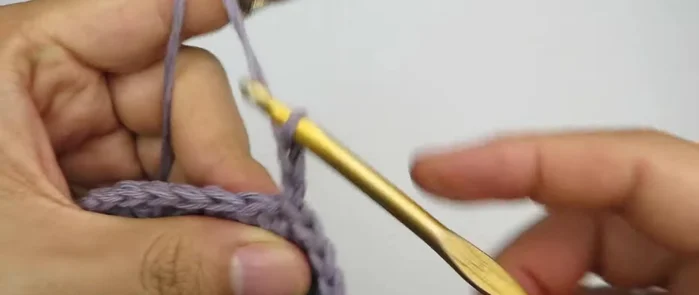
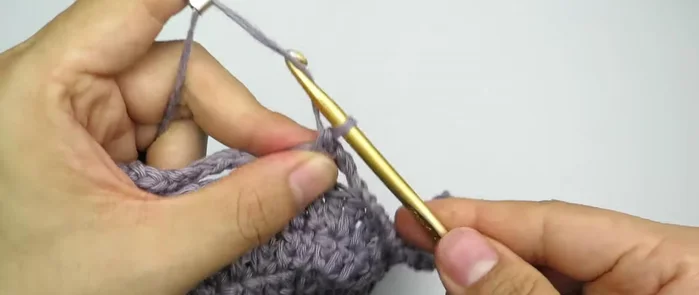
- Create a magic circle using two strands of thin yarn.
- Chain 2, then work 12 double crochet stitches into the magic ring.
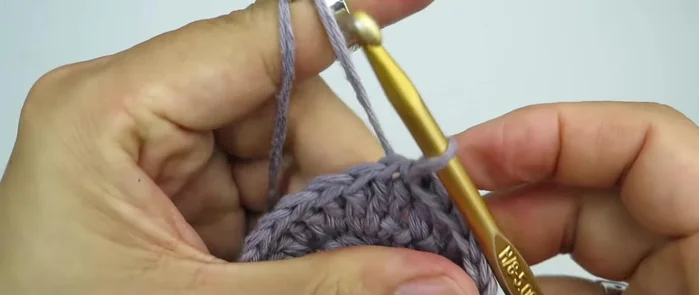
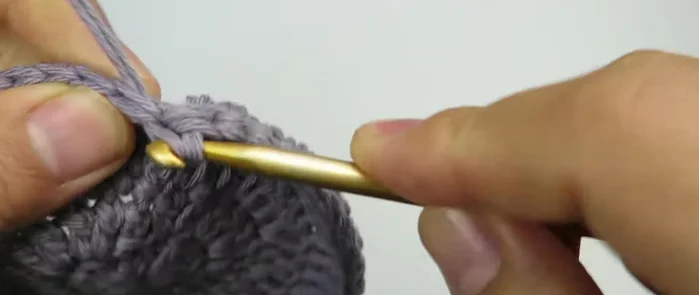
- Slip stitch into the first stitch, chain 2, then work 2 double crochet stitches in each stitch around (total 24 stitches).
- Slip stitch into the first stitch, chain 2, then work (1 double crochet, increase) in each stitch around (total 36 stitches).

Create the base - Slip stitch into the first stitch, chain 2, then work (1 double crochet, 1 double crochet, increase) in each stitch around (total 48 stitches).
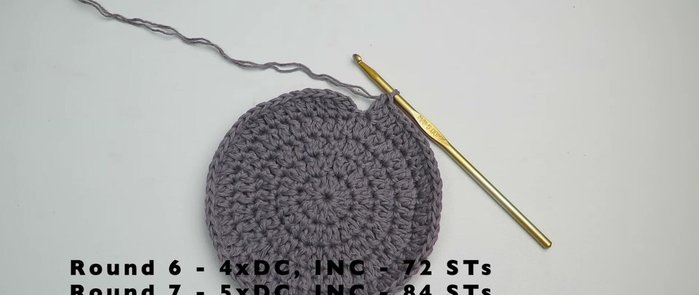
- Slip stitch into the first stitch, chain 2, then work (3 double crochet, increase) in each stitch around (total 60 stitches).
- Continue increasing rounds until desired size is reached (approximately 108 stitches in round 9).
Create the base Create the bag body
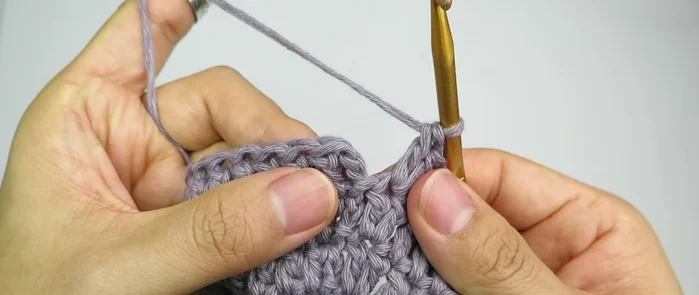
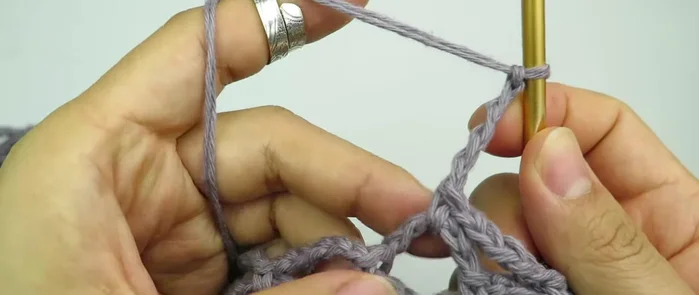
- Slip stitch into the first stitch, chain 5, skip 2 stitches, single crochet in the next stitch, chain 5, repeat around.
- Single crochet in each chain space, chain 5, repeat around.
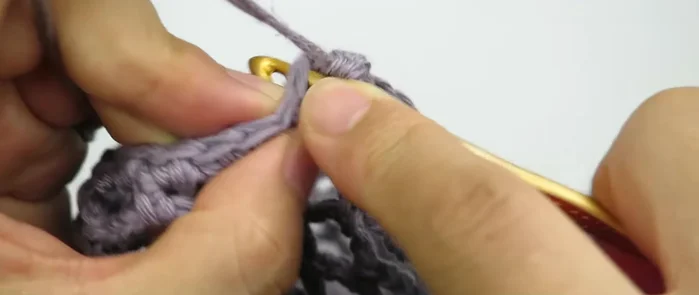
- Single crochet in chain space, 2 single crochet in next chain space. Single crochet in next stitch, 2 single crochet in next chain space. Repeat around.
- Single crochet in each stitch for 5 rounds to finish the bag body.
Create the bag body Create the handles
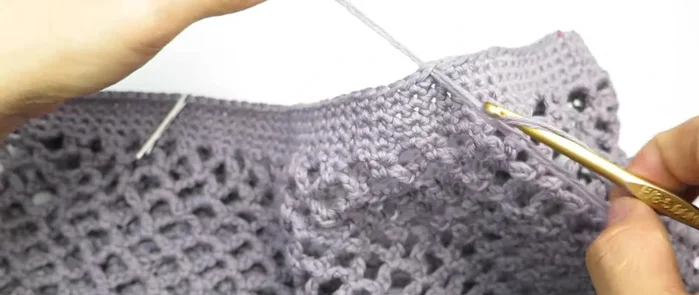
- Chain 80, attach to the marked stitches on the bag, single crochet along the chain in the back loop only, join and fasten off.
Create the handles
Read more: Easy Color Block Crochet Blanket Tutorial for Beginners
Tips
- Use a crochet ring for a neater magic circle.
- Adjust the number of stitches and rounds to create a bag in your desired size.
- Work in the back loop only for a cleaner handle finish.