Spring is in the air, and what better way to celebrate the season than by crafting a beautiful and cozy granny square pillow? This beginner-friendly crochet tutorial will guide you through creating a vibrant, spring-themed pillow, perfect for adding a touch of handmade charm to your home décor. Even if you're completely new to crochet, don't worry! We'll break down each step with clear instructions and helpful photos, making this project accessible to all skill levels. You'll learn basic crochet stitches while creating something truly special.
This charming pillow is crafted using cheerful, springtime colors and simple granny square construction. Get ready to unleash your creativity and personalize your design by choosing your favorite yarn colors. Ready to get started on your cheerful spring project? Let's dive into the step-by-step instructions and transform simple yarn into a delightful handmade pillow!
Preparation and Safety Guidelines
- Yarn (Lion Brand Cupcake Cake yarn recommended)
- Crochet hook
- Use appropriate yarn weight and hook size as specified in your pattern. Using the wrong size can drastically alter the finished size and tension of your granny square, leading to an uneven pillow.
- Always check your tension regularly. Inconsistent tension will affect the overall look and feel of your pillow. Practice a small swatch before starting the main project.
- Be mindful of your yarn ends. Secure them properly as you go to avoid loose ends in your finished pillow. Weaving in ends after you've completed your project is time-consuming.
Step-by-Step Instructions
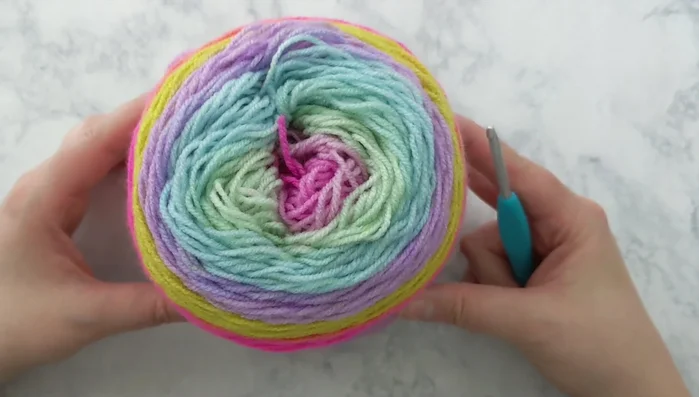
Prepare Materials
- Separate and roll each color into a ball for organization.

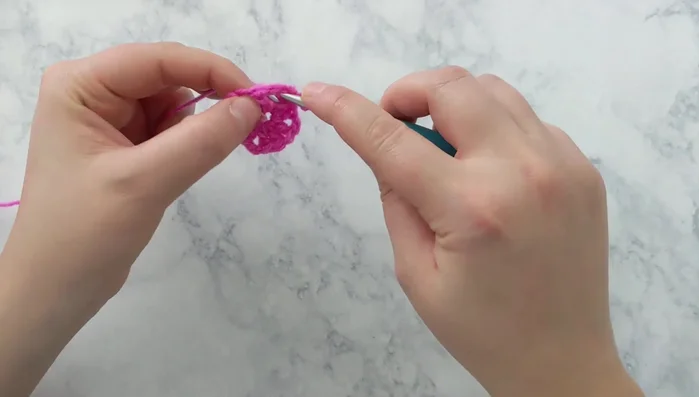
Prepare Materials Create the First Granny Square
- Begin with a magic ring, chain 5 (counts as a double crochet), chain 2, 3 double crochet. Repeat the chain 2 and 3 double crochet sequence three more times. Chain 2, 2 double crochet. Slip stitch to join.
- Slip stitch to the next corner, chain 5 (counts as a double crochet + chain 2), 3 double crochet in the same space. Repeat three double crochet, chain 2, three double crochet sequence in each corner space. Finish with 2 double crochet in last corner. Slip stitch to join.
- Continue the pattern from Round 2, adding rounds and changing yarn colors as desired. The tutorial suggests changing colors mid-round to avoid weaving in many ends.
Create the First Granny Square Create the Second Granny Square
- Repeat steps 2-4 to create a second granny square of the same size.
Create the Second Granny Square Join the Granny Squares
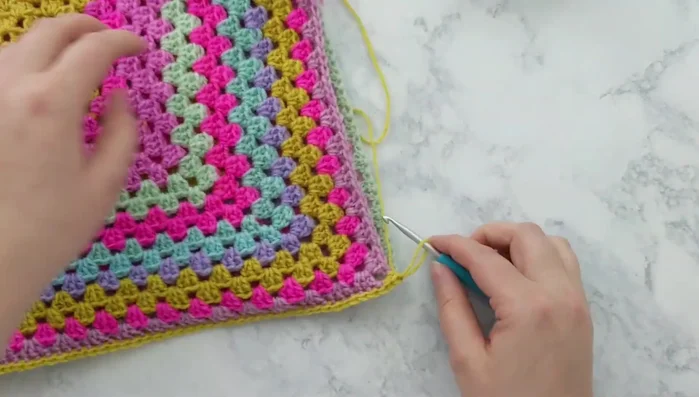
- Place the squares right sides facing out, wrong sides together. Start in a corner, and single crochet through both layers, working around all four sides.
- Single crochet three sides together, creating three single crochets in each corner. Leave one side open.
Insert Pillow Form
- Insert the pillow form into the open side of the cover.
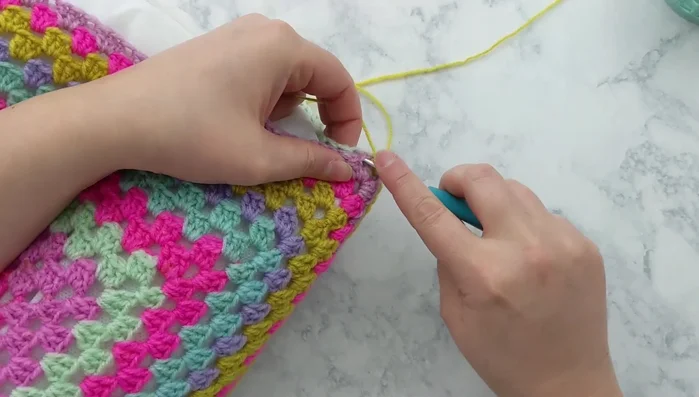
Insert Pillow Form Close Pillow Cover
- Single crochet the remaining open side to close the pillow cover.
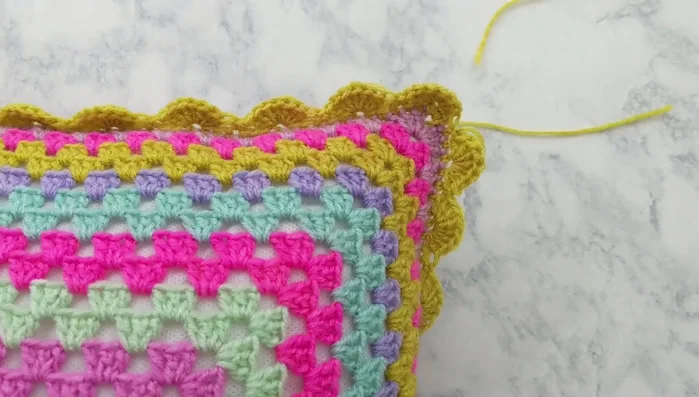
Close Pillow Cover Add Scalloped Edge (Optional)
- Skip 2 stitches, make 7 double crochets into the next stitch. Repeat skip 2 stitches, single crochet, skip 2 stitches, 7 double crochet sequence around. Join with a slip stitch.
Finish
- Weave in ends.
Finish

Read more: Easy Color Block Crochet Blanket Tutorial for Beginners
Tips
- Organize your yarn by separating and rolling each color into a ball before starting.
- Change yarn colors mid-round to minimize end weaving.
- Crochet over tails as you go to reduce the amount of weaving-in needed later.
- Adjust the number of rounds to achieve your desired pillow size. Make both squares the same size.
- Consider adding closures (buttons, velcro, zipper) instead of fully closing the pillow cover if desired.