Crochet bags are a delightful blend of practicality and personal style, offering a unique and handcrafted alternative to mass-produced totes. Adding a zipper, however, can often seem like a daunting task, potentially discouraging even experienced crocheters. But fear not! Installing a zipper into your crocheted creation doesn't have to be a complicated ordeal. With the right techniques and a little patience, you can effortlessly elevate your bag from charming to completely functional.
This guide will walk you through a straightforward, step-by-step process for seamlessly integrating a zipper into your finished crochet bag. We'll cover everything from preparing your zipper and crocheted piece to securing the zipper tape and creating a neat, professional finish. Forget struggling with fiddly techniques; let's get started and transform your beautiful handmade bag into a secure and stylish everyday accessory!
Preparation and Safety Guidelines
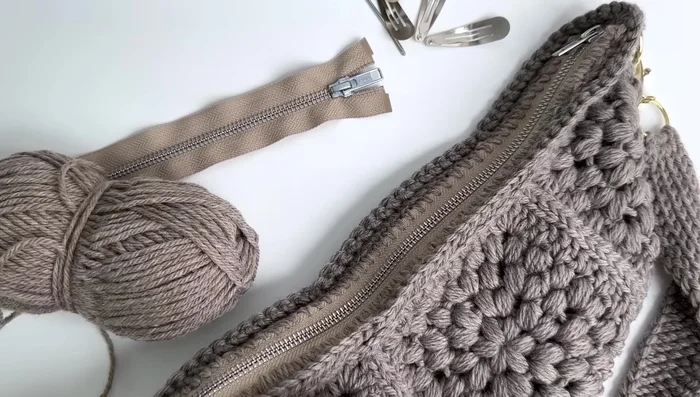
- Zipper
- 2.5 mm crochet hook
- Worsted weight yarn
- Yarn needle
- Clips
- Always use a zipper that is the appropriate length for your bag opening. A zipper too short will leave gaps, and a zipper too long will be difficult to install and may bunch up.
- Use sharp scissors to trim excess zipper tape. Jagged edges can snag your yarn or cause injury.
- Before permanently stitching the zipper in place, test the zipper’s functionality to ensure it moves smoothly. Adjust placement as needed before securing.
Step-by-Step Instructions
Prepare Zipper and Bag
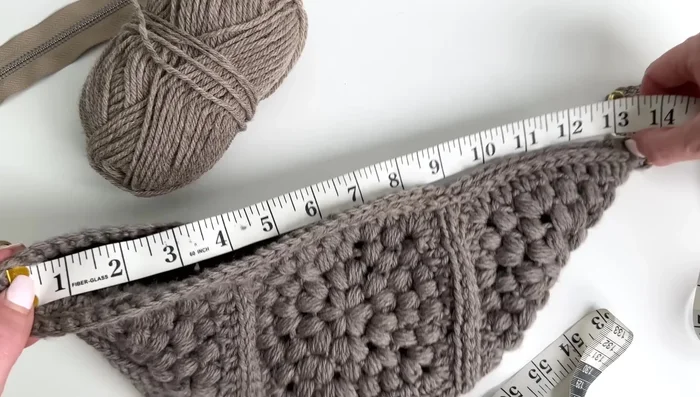
- Measure the inside of your crochet bag where you want to attach the zipper. Choose a zipper that's at least that length, preferably a little longer.
- Measure the desired length of the zipper on your bag (e.g., 13 inches) and mark it.

Prepare Zipper and Bag Crochet Zipper Sides
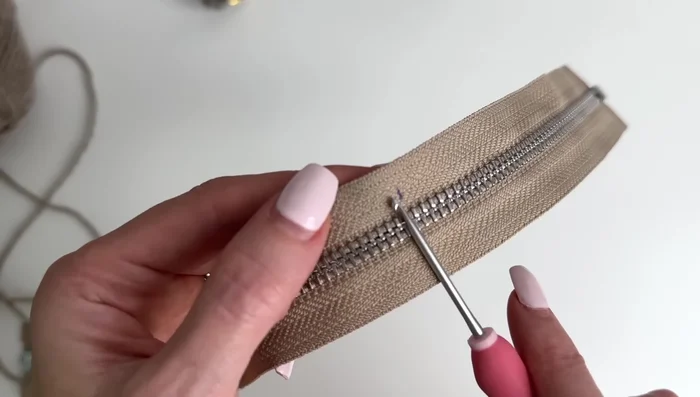
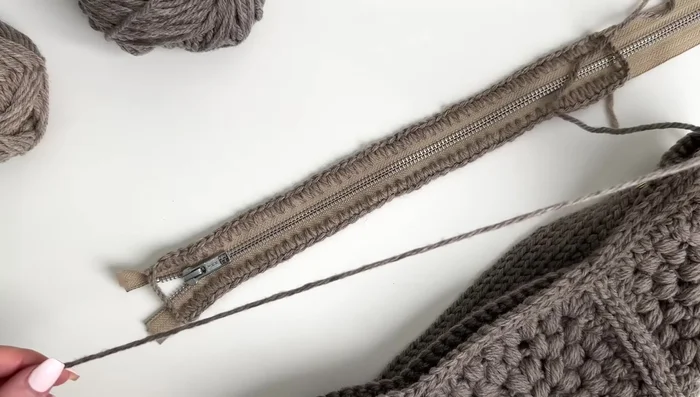
- Using a 2.5 mm crochet hook and yarn, crochet along the zipper teeth. Insert the hook through the zipper teeth, creating a chain stitch all along one side of the zipper.
- Repeat step 3 for the other side of the zipper.
Crochet Zipper Sides Sew Zipper to Bag (First Side)
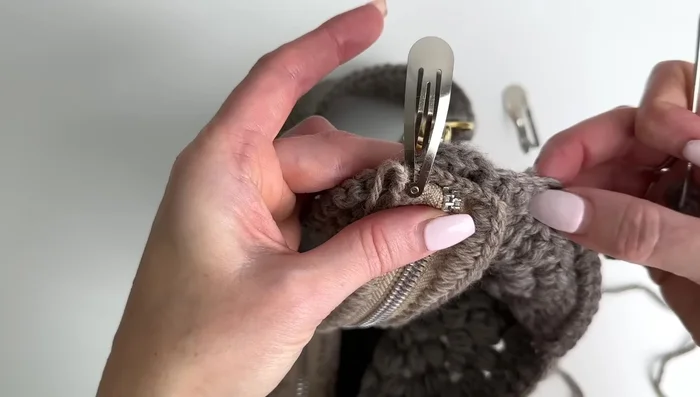
- Use a yarn needle and matching yarn to sew the crocheted zipper to the bag's opening. Secure the zipper using clips if needed for easier sewing.
- Sew along the edge of the bag, catching both the crocheted zipper and the bag's stitches. Ensure even stitching.
Sew Zipper to Bag (First Side) Sew Zipper to Bag (Second Side)
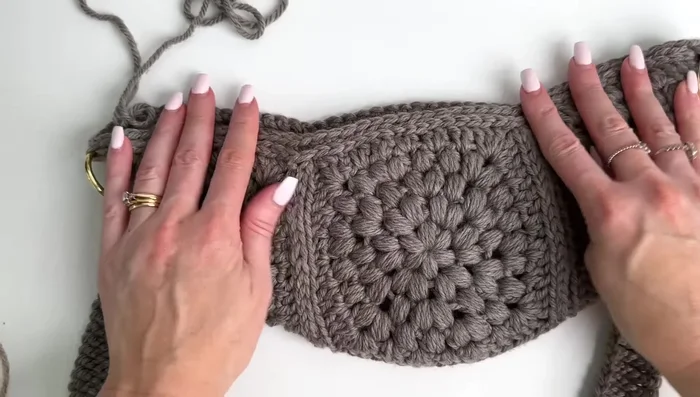
- Repeat the sewing process on the other side of the bag.
Sew Zipper to Bag (Second Side) Finish and Secure
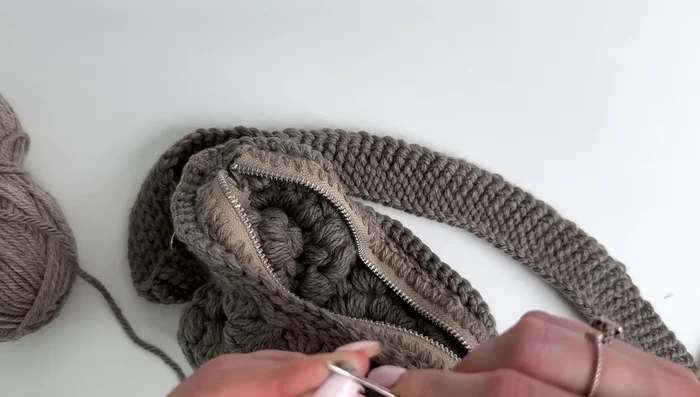
- Secure any loose ends and weave in the yarn tails.
- Optionally, sew down the loose ends of the crocheted zipper to keep them neat and tidy.
Finish and Secure

Read more: Easy Color Block Crochet Blanket Tutorial for Beginners
Tips
- Use a zipper slightly longer than the bag opening to allow for ease of sewing and closure.
- Using clips can help keep your zipper in place while sewing.
- Consider using the same yarn as the bag to make the zipper less noticeable. Choose the hook size appropriate for your yarn weight.
- For a cleaner look, sew down the extra zipper length at the end to avoid it flapping around.