Winter's chill can be a delightful challenge, especially when met with the warmth of a handmade accessory. There's something undeniably comforting about slipping on a cozy, hand-knitted headband, shielding your ears from the biting wind while adding a touch of personal style to your outfit. Imagine the soft yarn against your skin, the gentle texture of carefully crafted cables, and the satisfaction of wearing something you created yourself. This project is perfect for knitters of all levels, from beginners eager to try a new technique to experienced crafters seeking a satisfying quick-knit.
This tutorial will guide you through every step of creating your own stunning cable-knit headband, perfect for gifting or keeping for yourself. From casting on and establishing the cable pattern to weaving in the ends and admiring your finished creation, we'll break down the process into manageable, easy-to-follow instructions. Let's get started on knitting your cozy, cable-knit headband!
Preparation and Safety Guidelines
- Light worsted yarn
- 4mm knitting needles
- Cable needle
- 3mm crochet hook
- Always use sharp scissors to cut yarn; dull scissors can cause snags and injuries.
- Be mindful of your needle size and yarn weight to ensure the headband fits comfortably. Using the wrong size can lead to a too-tight or too-loose headband.
- Take breaks to avoid eye strain and repetitive strain injuries. Knitting for extended periods without breaks can be harmful.
Step-by-Step Instructions
Casting On
- Cast on 36 stitches using the standard longtail cast-on method.
Knitting the Headband
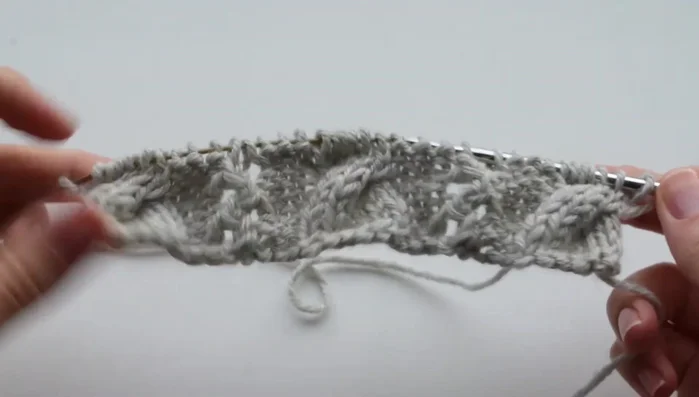
- Work in pattern (detailed below) until headband measures approximately 50 centimeters (19.5 inches).

Knitting the Headband Binding Off
- Bind off using a simple bind-off method (knit 2 together repeatedly).
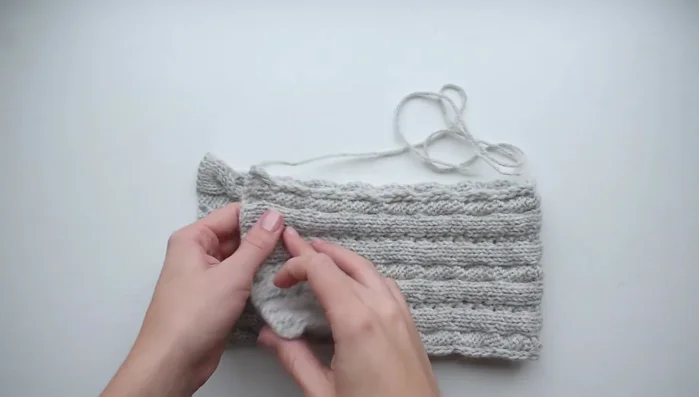
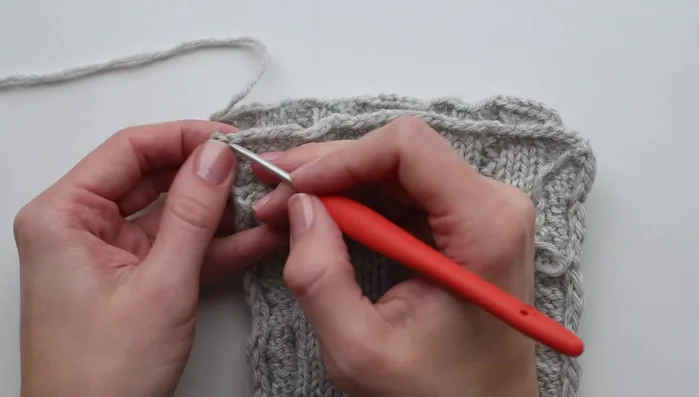
Seaming the Headband
- Fold the headband in half with the right side facing out.
- Using a crochet hook, seam the headband using a whip stitch, working under each edge stitch.
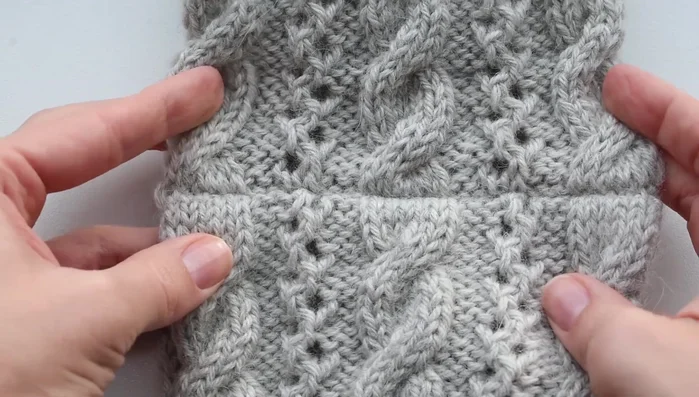
Seaming the Headband Finishing Touches
- Weave in ends and wash the headband.
Finishing Touches
Read more: Knitting a Reversible Basketweave Blanket: A Customizable Guide
Tips
- Use two needles for the cast-on to make the first row easier to work with.
- Slip the first stitch and purl the last stitch of every row to create a chain edge.
- Detailed instructions for the cable pattern are given throughout the video (from 142.64 onwards).
- Leave a 50-centimeter (20-inch) tail when cutting the yarn for seaming.