Learning to crochet can feel daunting, but it doesn't have to be! This easy beginner scarf pattern is the perfect project to kickstart your crocheting journey. With its simple, one-row repeat design, you'll be mastering basic stitches and creating a cozy accessory in no time. No prior experience is necessary, and the pattern focuses on clear, concise instructions, making it ideal for absolute beginners. This project utilizes readily available materials, meaning you likely already have what you need at home to start crafting your very own handmade scarf.
This simple, repetitive pattern is perfect for practicing fundamental crochet techniques like chain stitches, single crochet, and double crochet. You'll find yourself quickly building confidence as you watch your scarf grow with each row. Ready to get started on your first crochet project? Let's dive into the step-by-step instructions and begin creating this beautiful and functional scarf.
Preparation and Safety Guidelines
- Yarn (any type, DK yarn used in example)
- Crochet Hook (5mm hook recommended, 6mm for foundation chain)
- Always use sharp scissors to cut yarn; dull scissors can cause frayed ends and make your work look messy.
- Keep your tension consistent throughout the project. Inconsistent tension will result in an uneven scarf.
- Before starting, check your gauge (stitches and rows per inch) to ensure your scarf will be the desired size. Using a different yarn weight or hook size than specified in your pattern will affect the final size.
Step-by-Step Instructions
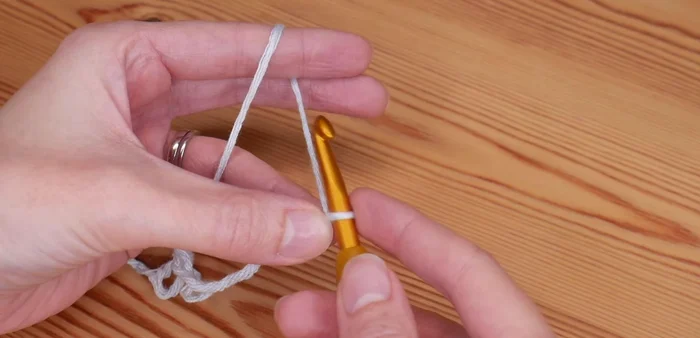
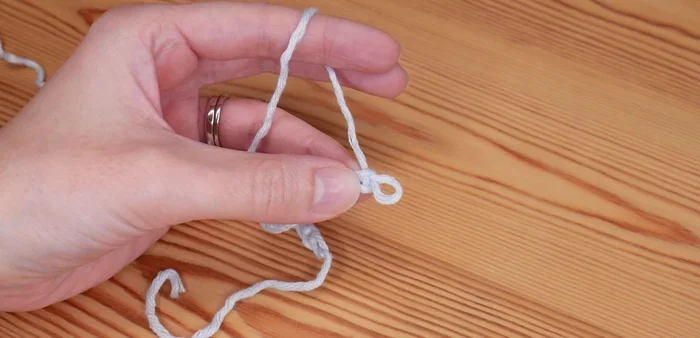
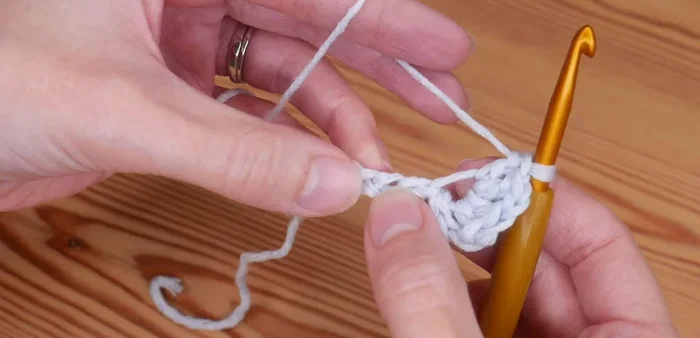
Foundation Chain
- 21 + 2 = 23 chains)

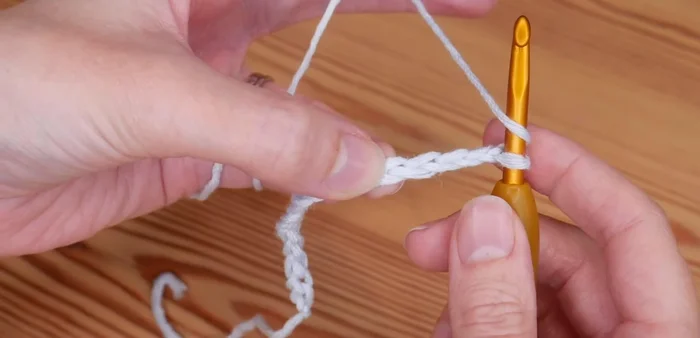
Foundation Chain First Row: Establishing the Repeat Pattern
- Switch to your 5mm hook. Work into the fifth chain from the hook.
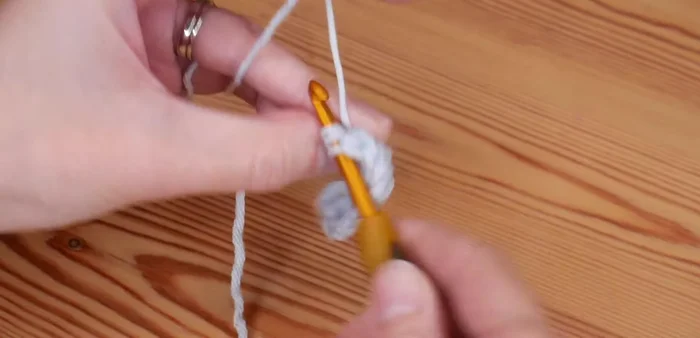
- Make a treble (UK treble or US double crochet).
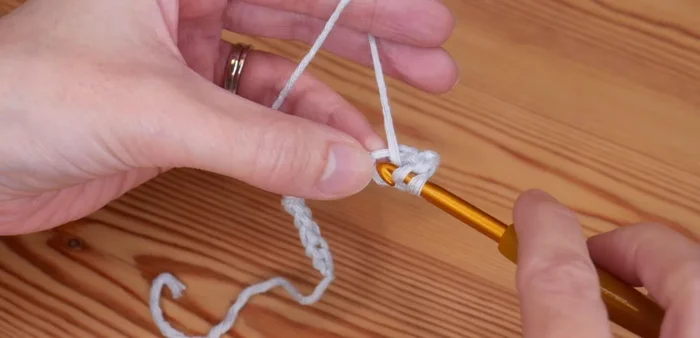
- In the same chain, make another treble, chain one, then two more trebles in the same chain. (4 trebles + 1 chain in total)
- Skip the next two chains. In the third chain, repeat step 4 (2 trebles, chain one, 2 trebles).
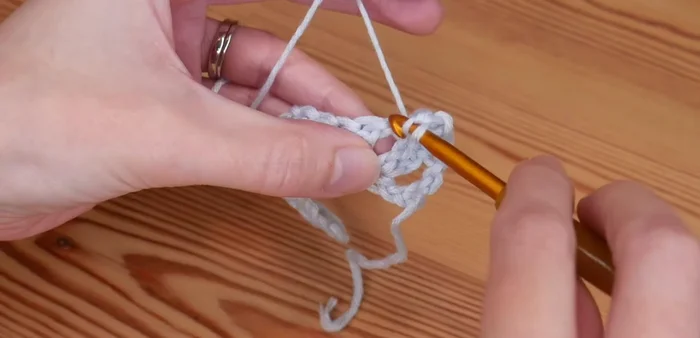
First Row: Establishing the Repeat Pattern - Repeat steps 4 and 5 across the row, ending with a single treble in the last chain.
First Row: Establishing the Repeat Pattern Subsequent Rows: Repeating the Pattern
- Turn your work. Insert hook into the first stitch (where the working end comes up from). Work a treble, then another treble behind the left vertical post of the same stitch.
- Skip to the next chain-one space, and repeat steps 4 and 5 from the previous row. Continue this until the end of the row.
Subsequent Rows: Repeating the Pattern Repeating Rows to Desired Length
- Repeat row 2 until your scarf reaches the desired length. To finish with a straight edge, follow the finishing steps.
Finishing for a Straight Edge
- Chain 2, skip to the next chain-one space, slip stitch. Chain 3, skip to next chain-one space, slip stitch. Repeat until the end of the row. Chain 2, treble into the top of the turning stitch.
Finishing for a Straight Edge

Read more: Knitting a Reversible Basketweave Blanket: A Customizable Guide
Tips
- Use a larger hook size (5mm instead of 4mm in this example) for the body of the scarf to achieve a drapier fabric.
- Wiggle your chains to flatten out the loops and avoid large gaps.
- Experiment with different yarn colors and textures for a unique look.
- Decide how you want to finish your scarf (long scarf with fringe, looped infinity scarf, etc.) before you start.