Need a sturdy, reliable step ladder but don't want to break the bank? Building your own DIY wooden step ladder is a surprisingly achievable project, offering a rewarding sense of accomplishment and a customized tool perfectly suited to your needs. This project focuses on a simple, eight-foot design, ideal for reaching those hard-to-reach places around the house or workshop. Forget about flimsy, mass-produced ladders – you'll be creating a robust and aesthetically pleasing addition to your tool collection, built to last with materials readily available at most hardware stores.
This guide provides a comprehensive step-by-step approach, taking you from selecting the right lumber to the final finishing touches. We'll cover essential measurements, safe joinery techniques, and crucial safety considerations ensuring you build a ladder that's not only strong but also completely secure. Let's get started on your eight-foot DIY wooden step ladder project!
Preparation and Safety Guidelines
- Wood (two 8-foot long supports)
- Nails
- Steps (6-7)
- Saw
- Measuring tools
- Always use appropriate safety gear, including eye protection and a dust mask, when cutting and sanding wood.
- Ensure all screws and joints are securely fastened before using the ladder. Test the stability thoroughly before climbing.
- Never overload the ladder. The weight capacity is limited by the wood's strength and construction; exceed it and risk serious injury.
Step-by-Step Instructions
Prepare Support Beams
- Prepare two 8-foot long support beams.
- Cut the feet of the support beams to create a stable base.

Prepare Support Beams Assemble Ladder Sides
- Position the two support beams to create the ladder's sides, forming a 30-degree angle from the bottom and 90 degrees between the top and bottom.
- Attach the second support beam to the first.
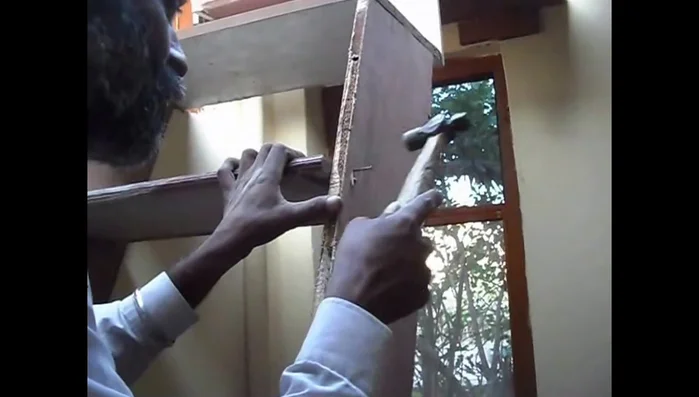
Assemble Ladder Sides Attach Steps (Initial)
- Add 6-7 steps to the ladder structure.
- Attach the steps to the support beams using nails.
- Continue attaching the remaining steps.
Attach Steps (Initial) Secure Base
- Secure the feet of the second support beam to the ground.
Reinforce Structure
- Reinforce the connection between the support beams and steps for additional strength.


Read more: Build a Stunning Black Walnut Coaster Set: The Ultimate Furniture Protector
Tips
- Ensure the support beams are properly aligned to create the desired angle.
- Use appropriate nails for secure connections.
- Maintain even spacing between the steps.